Creating Test Cases
 |
|---|
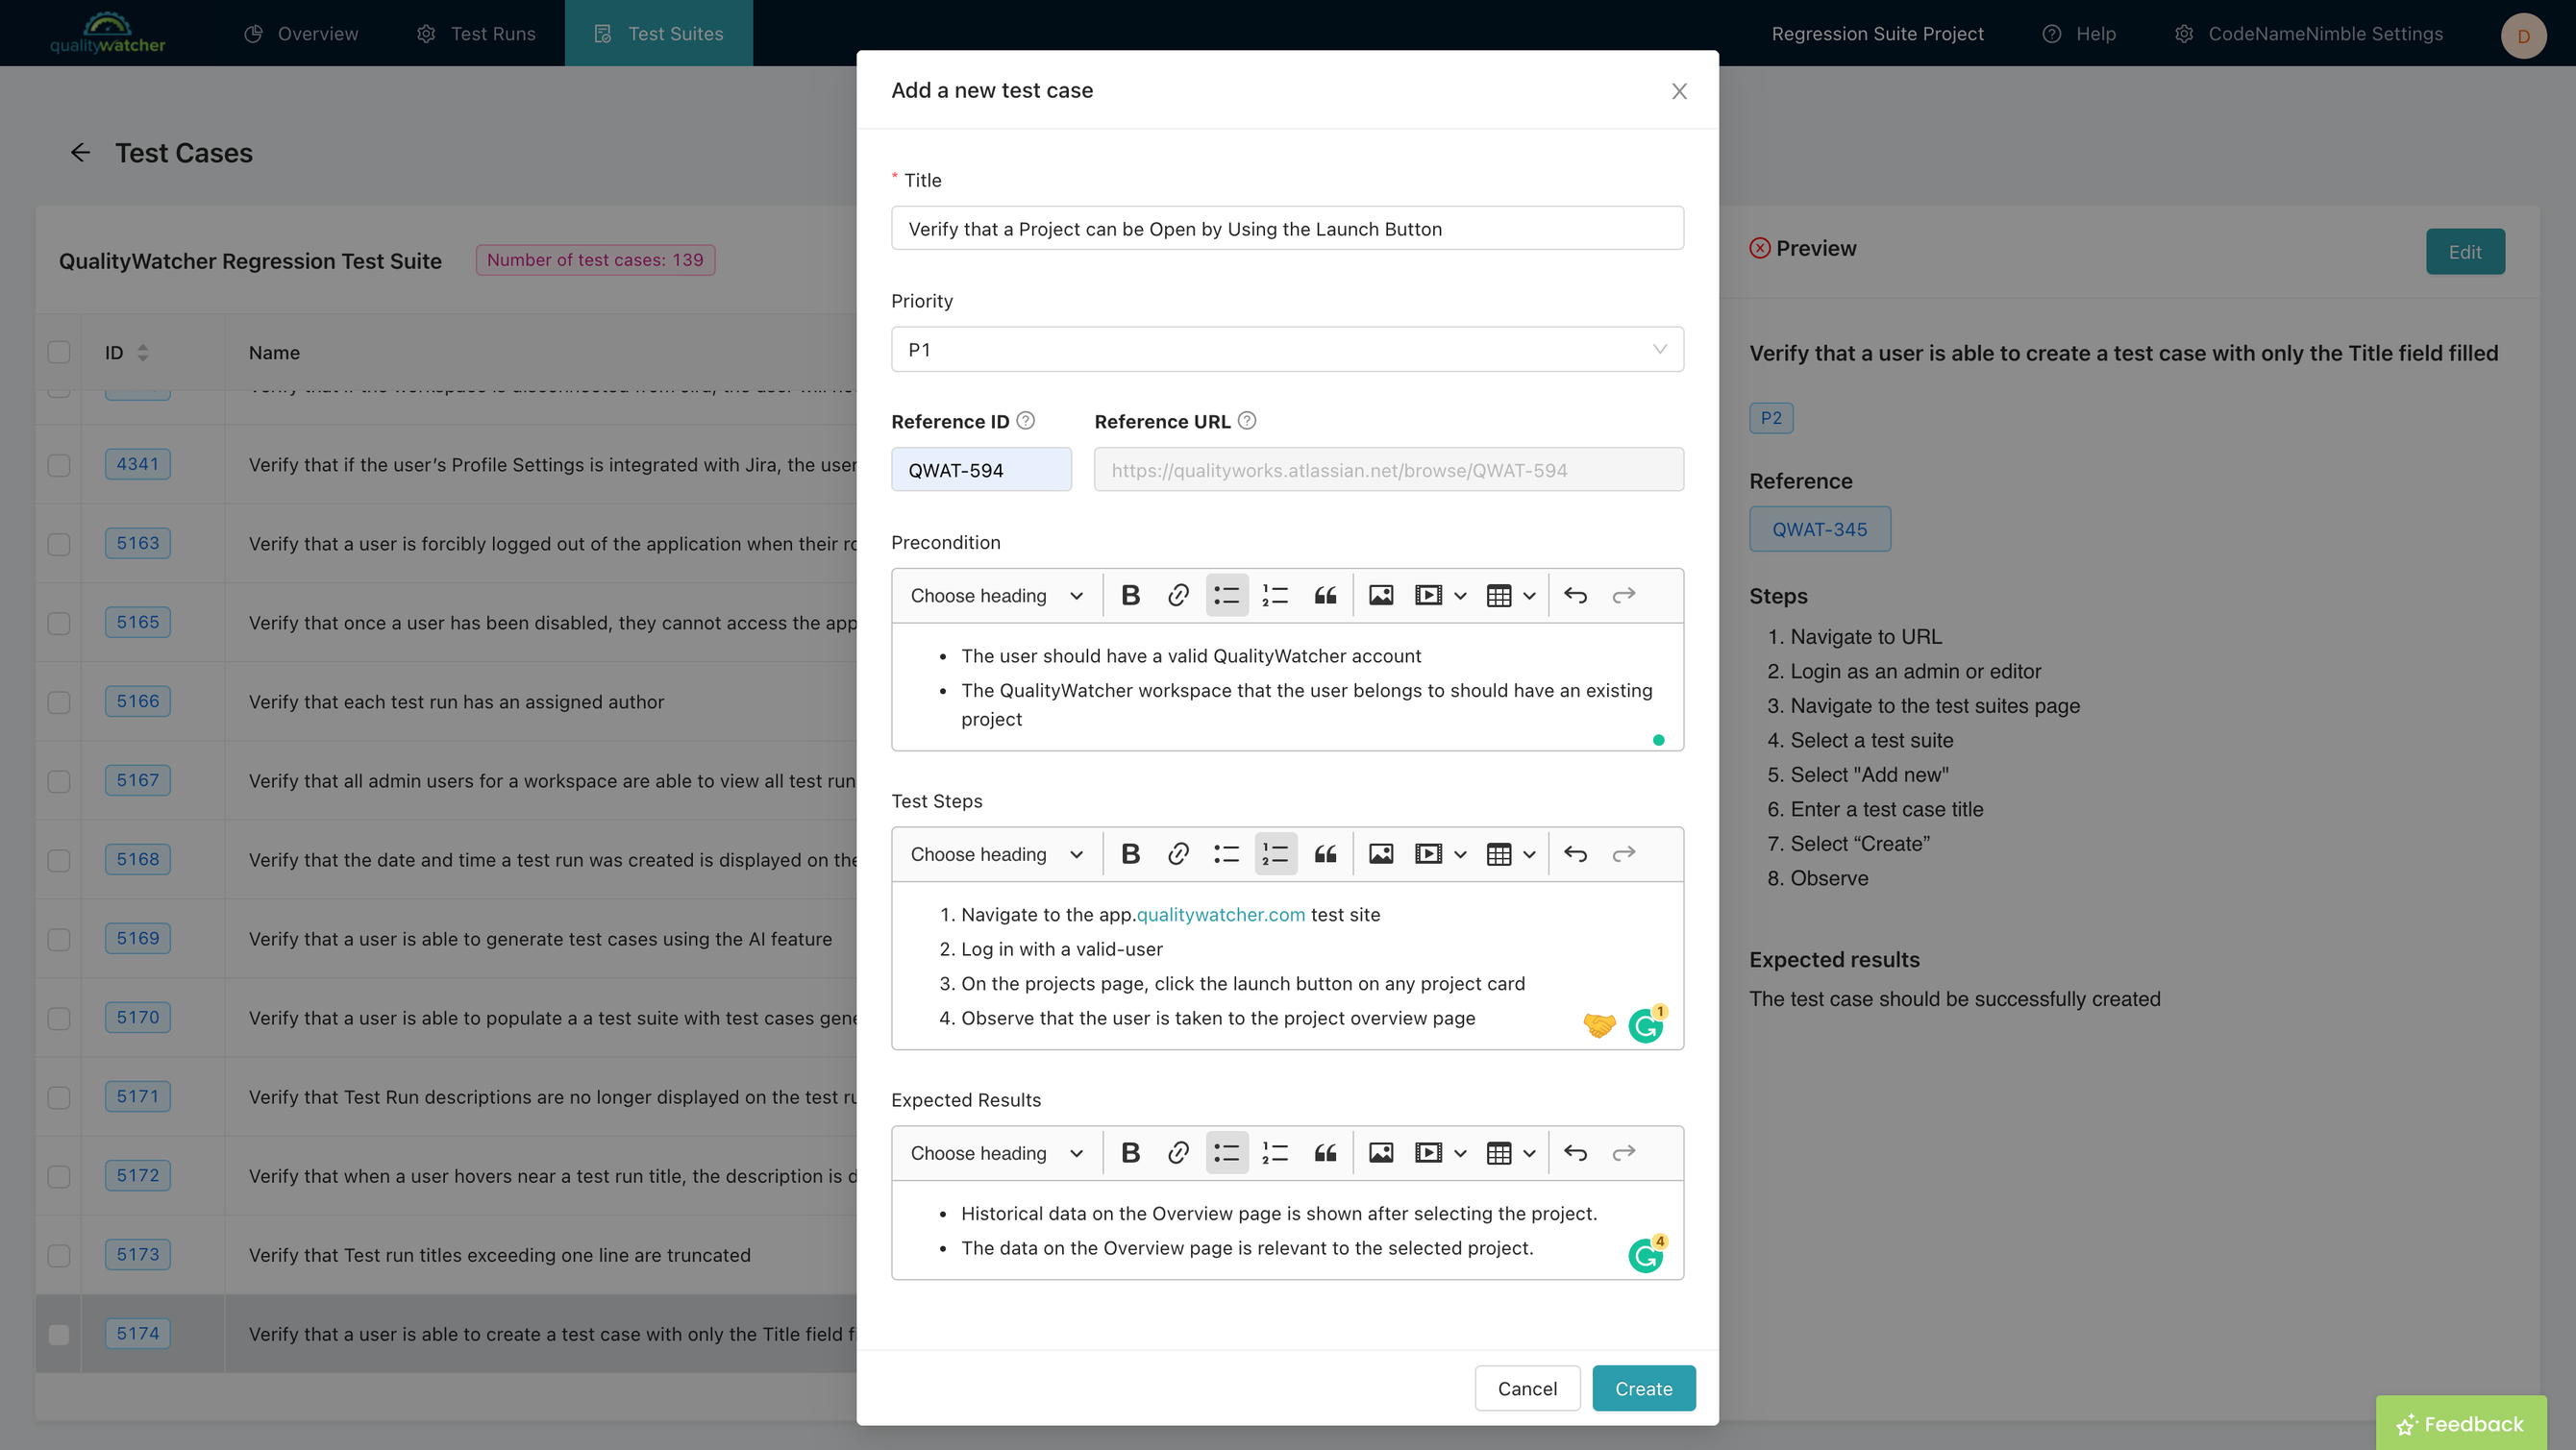
| Adding a test case in QualityWatcher |
At the core of any test case management tool, you need to be able to create test cases. In QualityWatcher, the only field required to create a test case is the title, but we recommend you use all fields when creating test cases to get all the benefits of using QualityWatcher.
Below you can see the breakdown of how we want our test cases to look within QualityWatcher:
Title
The title of the test case should contain enough information so that, with a quick glance, you will know exactly what you are testing and what you are expecting. To accomplish this, you should use the following format:
info
Verify (expected result) can be produced by (action)
How would this look as a real test case? Let's use a QualityWatcher Website test case for an example:
info
Verify that a Project can be Open by Using the Launch Button
As we see from the title of the test case, we know exactly what we are looking to test, and we know the test case’s purpose. That is the main purpose of having this format for our test case title. It is quick and easy to know exactly what needs to be tested without having to open up the test case itself.
Priority
Each test case should have a priority based on its importance. This will help with regressions and build quality calculations. Priority can differ based on companies but, in general, these are things you should consider.
info
Priority 2 (P2) – High A major component of the client's ability to operate is affected. Some aspects of the business can continue but it's a major problem.
Priority 3 (P3) – Medium The client's core business is unaffected but the issue is affecting efficient operation by one or more people.
Priority 4 (P4) – Low - Nice to have - The issue is an inconvenience or annoying but there are clear workarounds or alternates.
As expected, each priority is tied back to the business/client, and that’s how we know the importance of this individual case.
References
We recommend linking test cases to your requirements, user stories, or specification documents to make it easier for testers to learn more about the case’s context. You can supply each test case with a reference ID and URL.
There is a seamless integration for Jira where you can view user stories without QualityWatcher, but you can still link requirements for any other requirements management software.
You will still benefit from the increased visibility of test case and requirement relations.
info
Reference ID: SOS-1234
Reference URL: https://qualityworks.atlassian.net/browse/SOS-1234 (if Jira is integrated, this field will auto-populate)
The Reference ID normally is included as a part of the full Reference URL.
Precondition
This section ensures you are able to provide additional context that might be needed to execute this current test when testing. It is normally anything the tester needs to do before executing the testing steps, and it’s optional based on what is being tested.
info
- The user should have a valid QualityWatcher account
- The QualityWatcher workspace that the user belongs to should have an existing project
Steps
This section lists the step-by-step instructions informing the user how they can navigate through the app/platform to get the desired expected results. Below is an example of the steps necessary to verify the desired expected results:
info
- Navigate to the app.qualitywatcher.com test site
- Log in with a valid-user
- On the projects page, click the launch button on any project card
- Observe that the user is taken to the project overview page
As expected, the Steps section provides you with in-depth directions that give the user a 100% chance to get the desired result that is listed. This section may have as many steps as necessary to direct the user properly.
Expected Result
The Expected Result should be the goal after the user performs all the steps listed in the Steps section. The Expected Results should never exceed more than 2-3 bullet points. If it exceeds 3 bullet points, you should expand the test case into smaller sections. Below you can see the Expected Results of the previously stated steps.
info
- Historical data on the Overview page is shown after selecting the project.
- The data on the Overview page is relevant to the selected project.
The listed Expected Results are self-explanatory and tell you exactly what you should see happen. This is what you should aim for when creating the Expected Results description.
 |
|---|
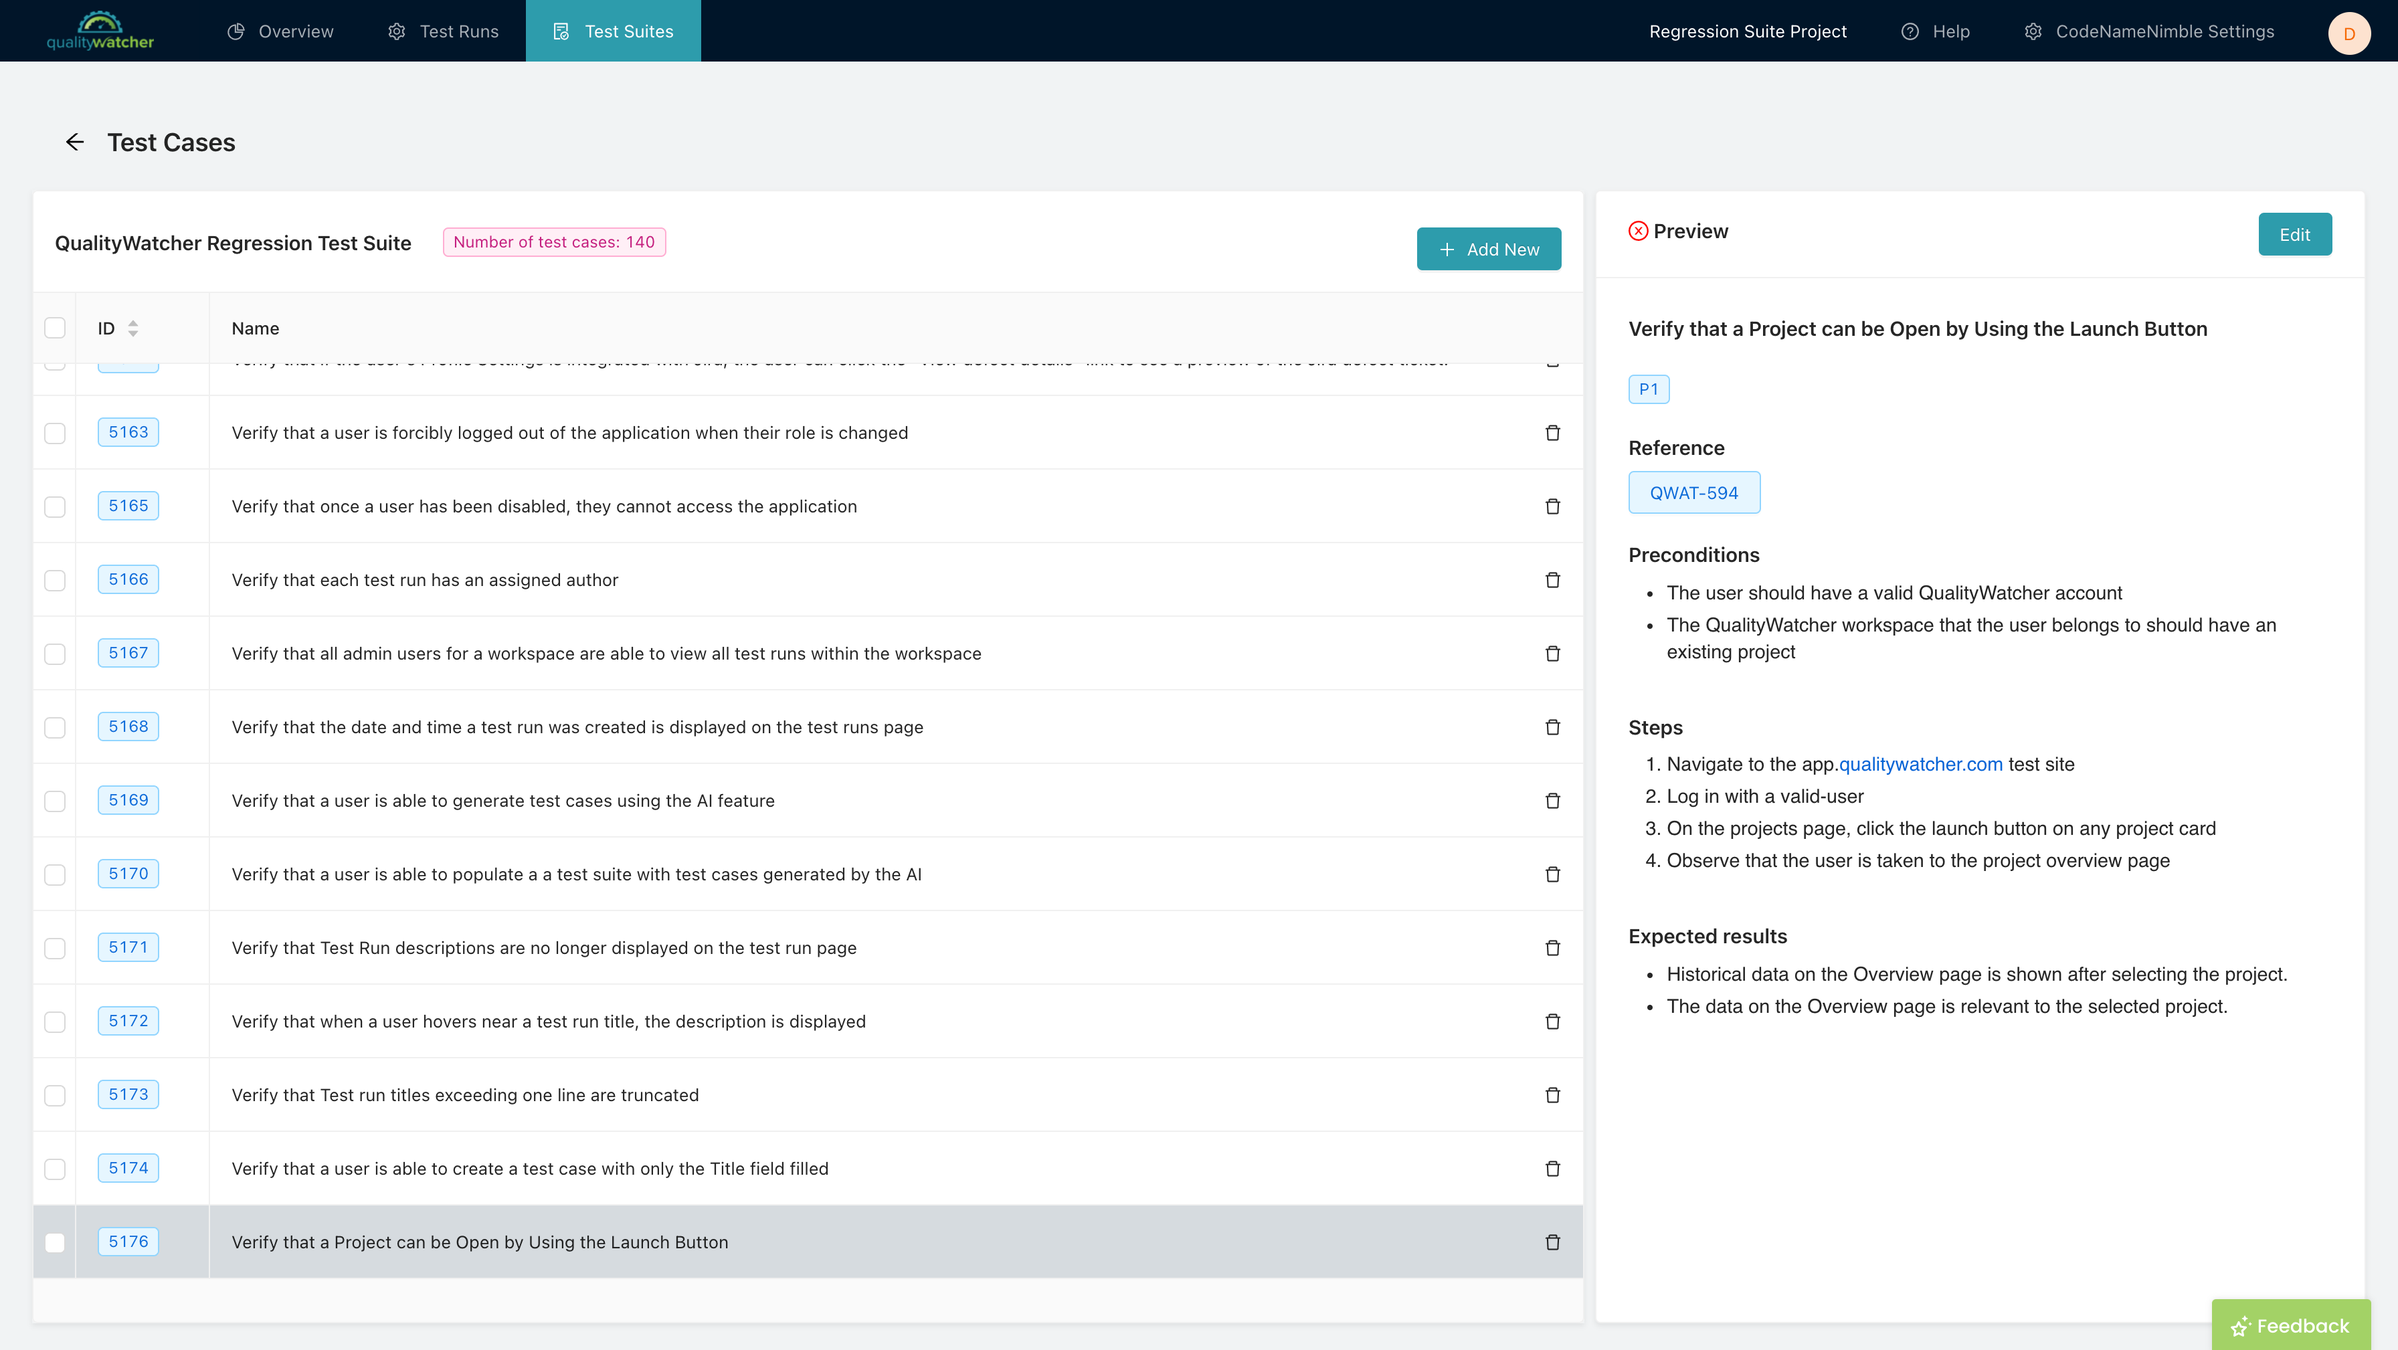
| Test Case preview on the right for created test case. |