Integrating Jira Into Your Workspace
Do you use Jira to manage your projects? If yes, why not connect your Jira board to your QualityWatcher workspace? QualityWatcher allows you to integrate Jira into your workspace, where you can take advantage of features such as:
Matching QualityWatcher projects to Jira projects
Linking QualityWatcher test cases to Jira tickets
Viewing linked/referenced Jira tickets within QualityWatcher
Creating bug tickets in Jira from your QualityWatcher workspace
info
An admin must first integrate Jira into a QualityWatcher workspace before other user types can access anything regarding Jira. Demonstrated below is how you can set up Jira as an Admin.
Jira Admin Setup
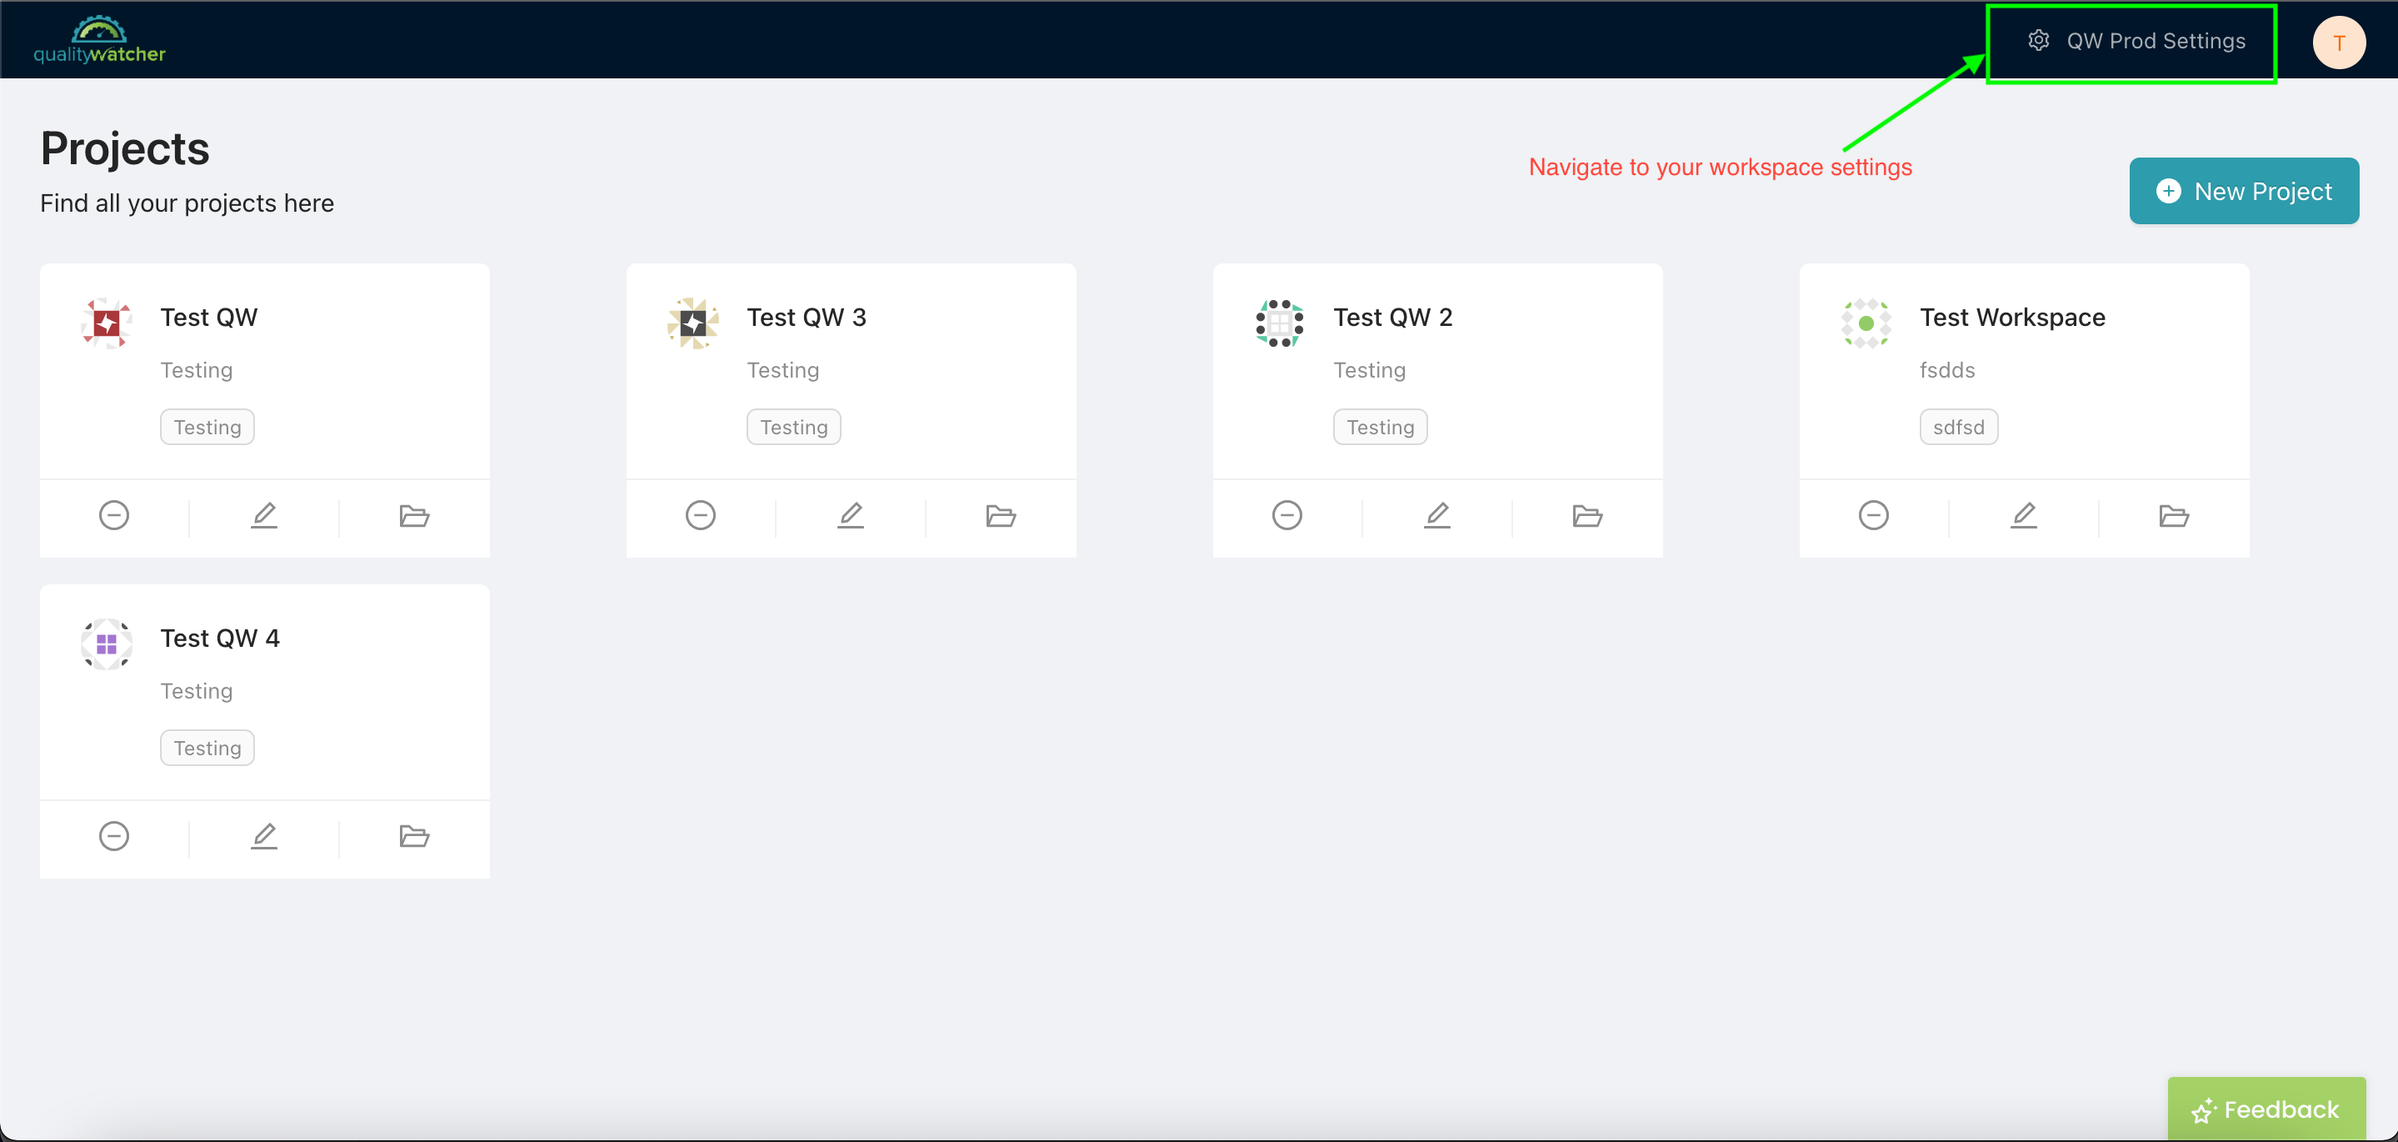
First, you must be logged in as an admin.
 |
|---|
| Navigate to and open your workspace settings. |
 |
|---|
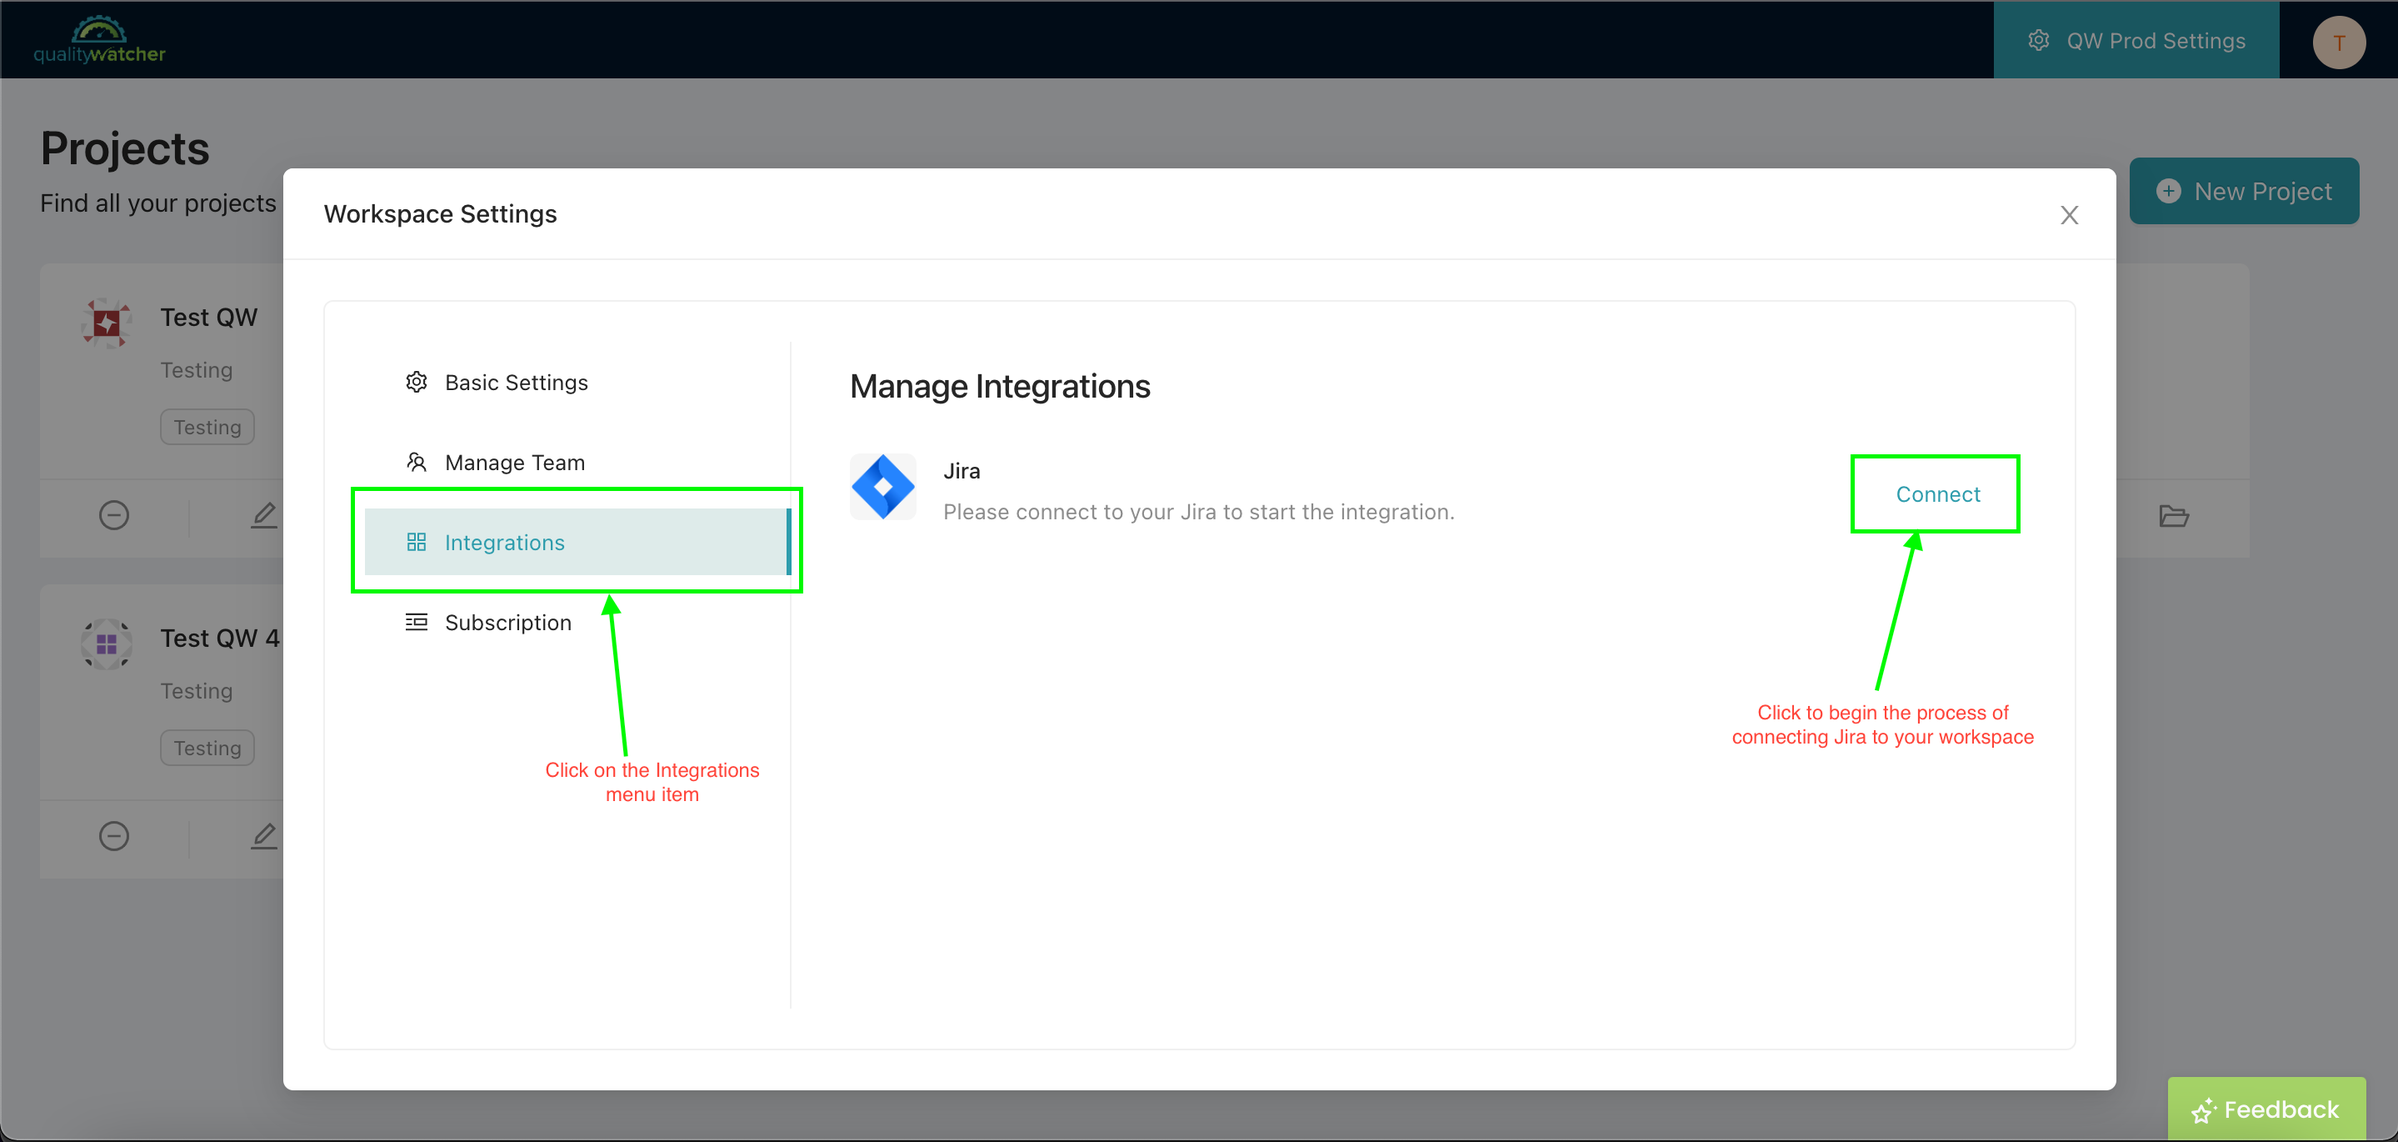
| Once you’re within your workspace settings, you will need to navigate and open the “Integrations” menu. Click “Connect” to begin your Jira integration process. |
 |
|---|
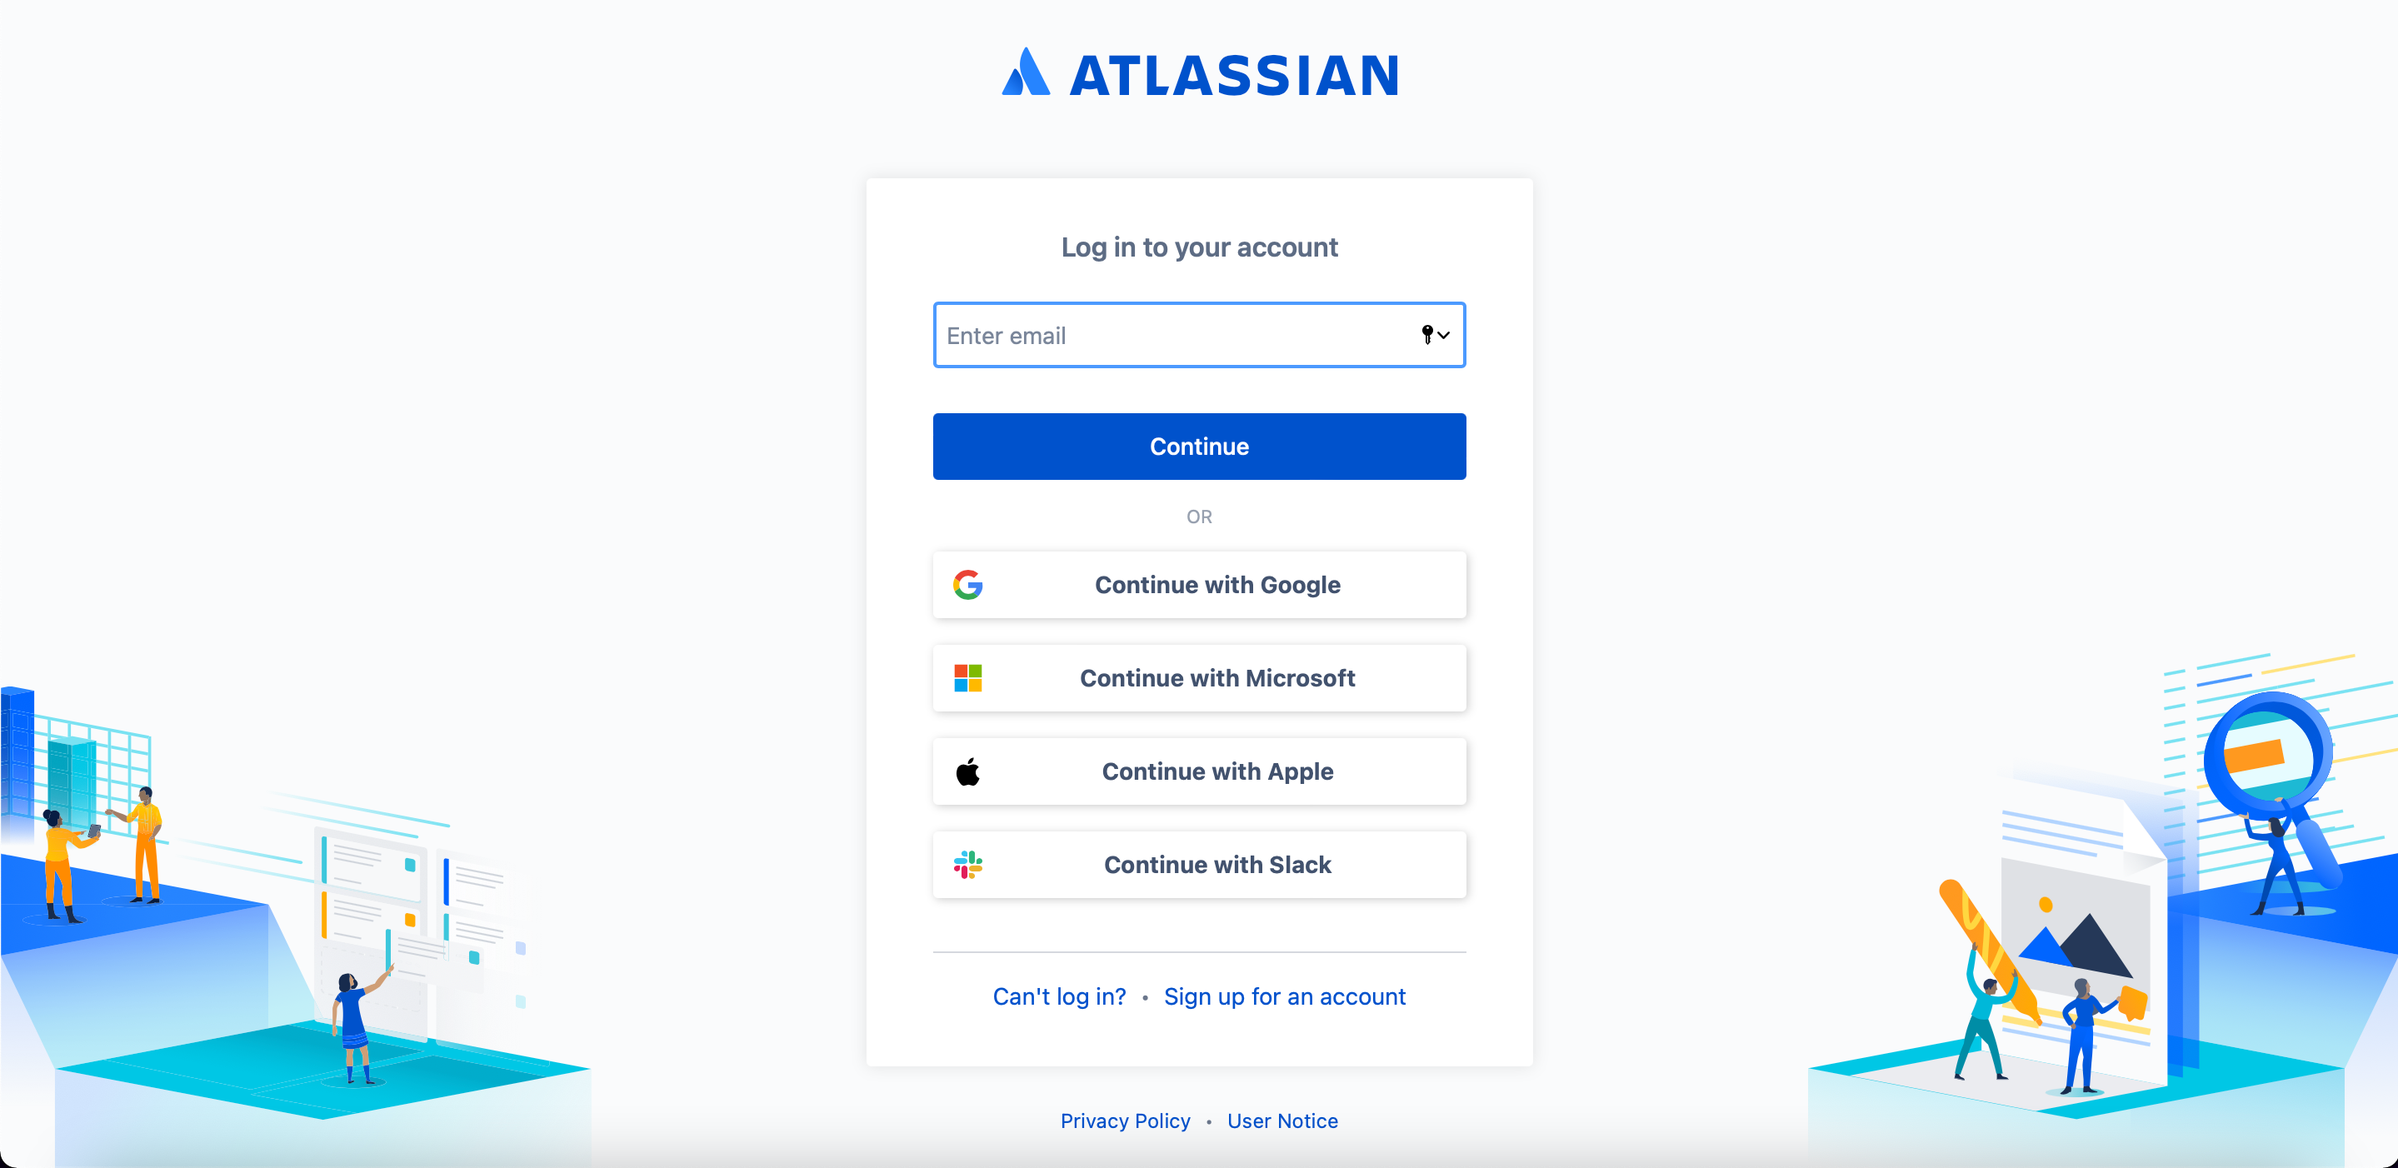
| Once the “Connect” is clicked, a new tab will be open with this screen if you’re not currently logged in to your Jira account. You will need to login and then you will be brought to the screen displayed below. |
 |
|---|
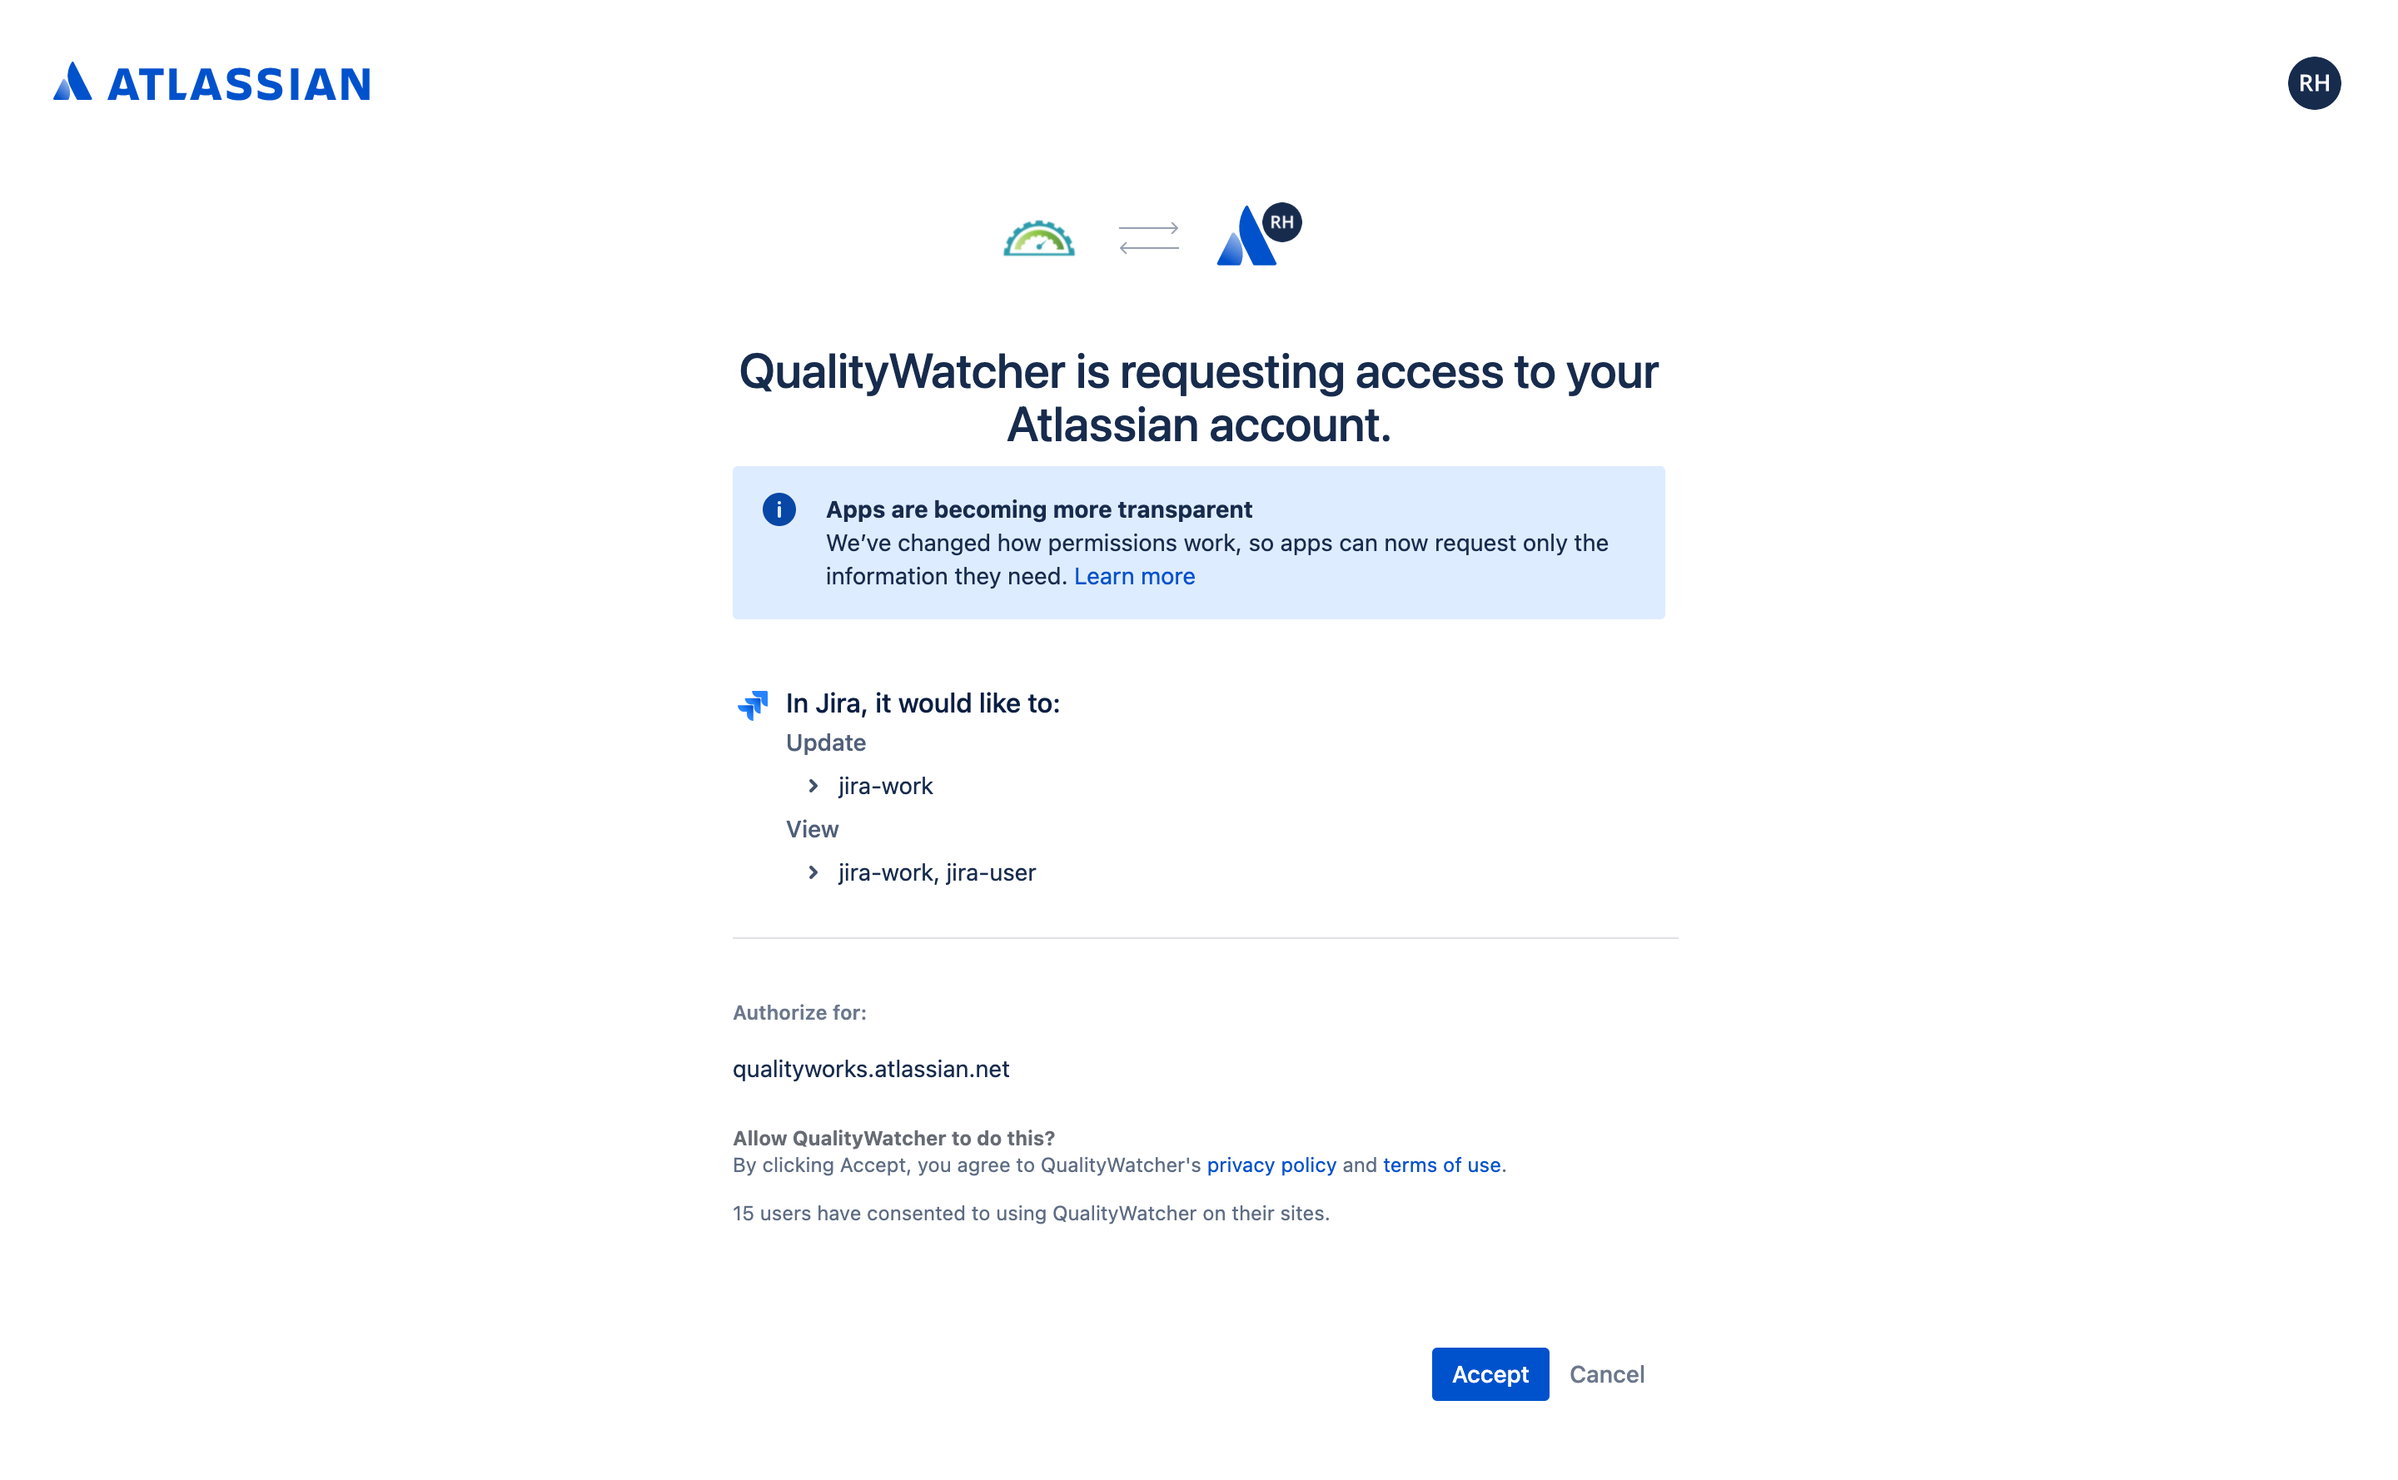
| Once the “Connect” is clicked, a new tab will be open with this screen if you’re currently logged in to your Jira account. Click “Accept” to give QualityWatcher access to your Atlassian account(Jira). |
 |
|---|
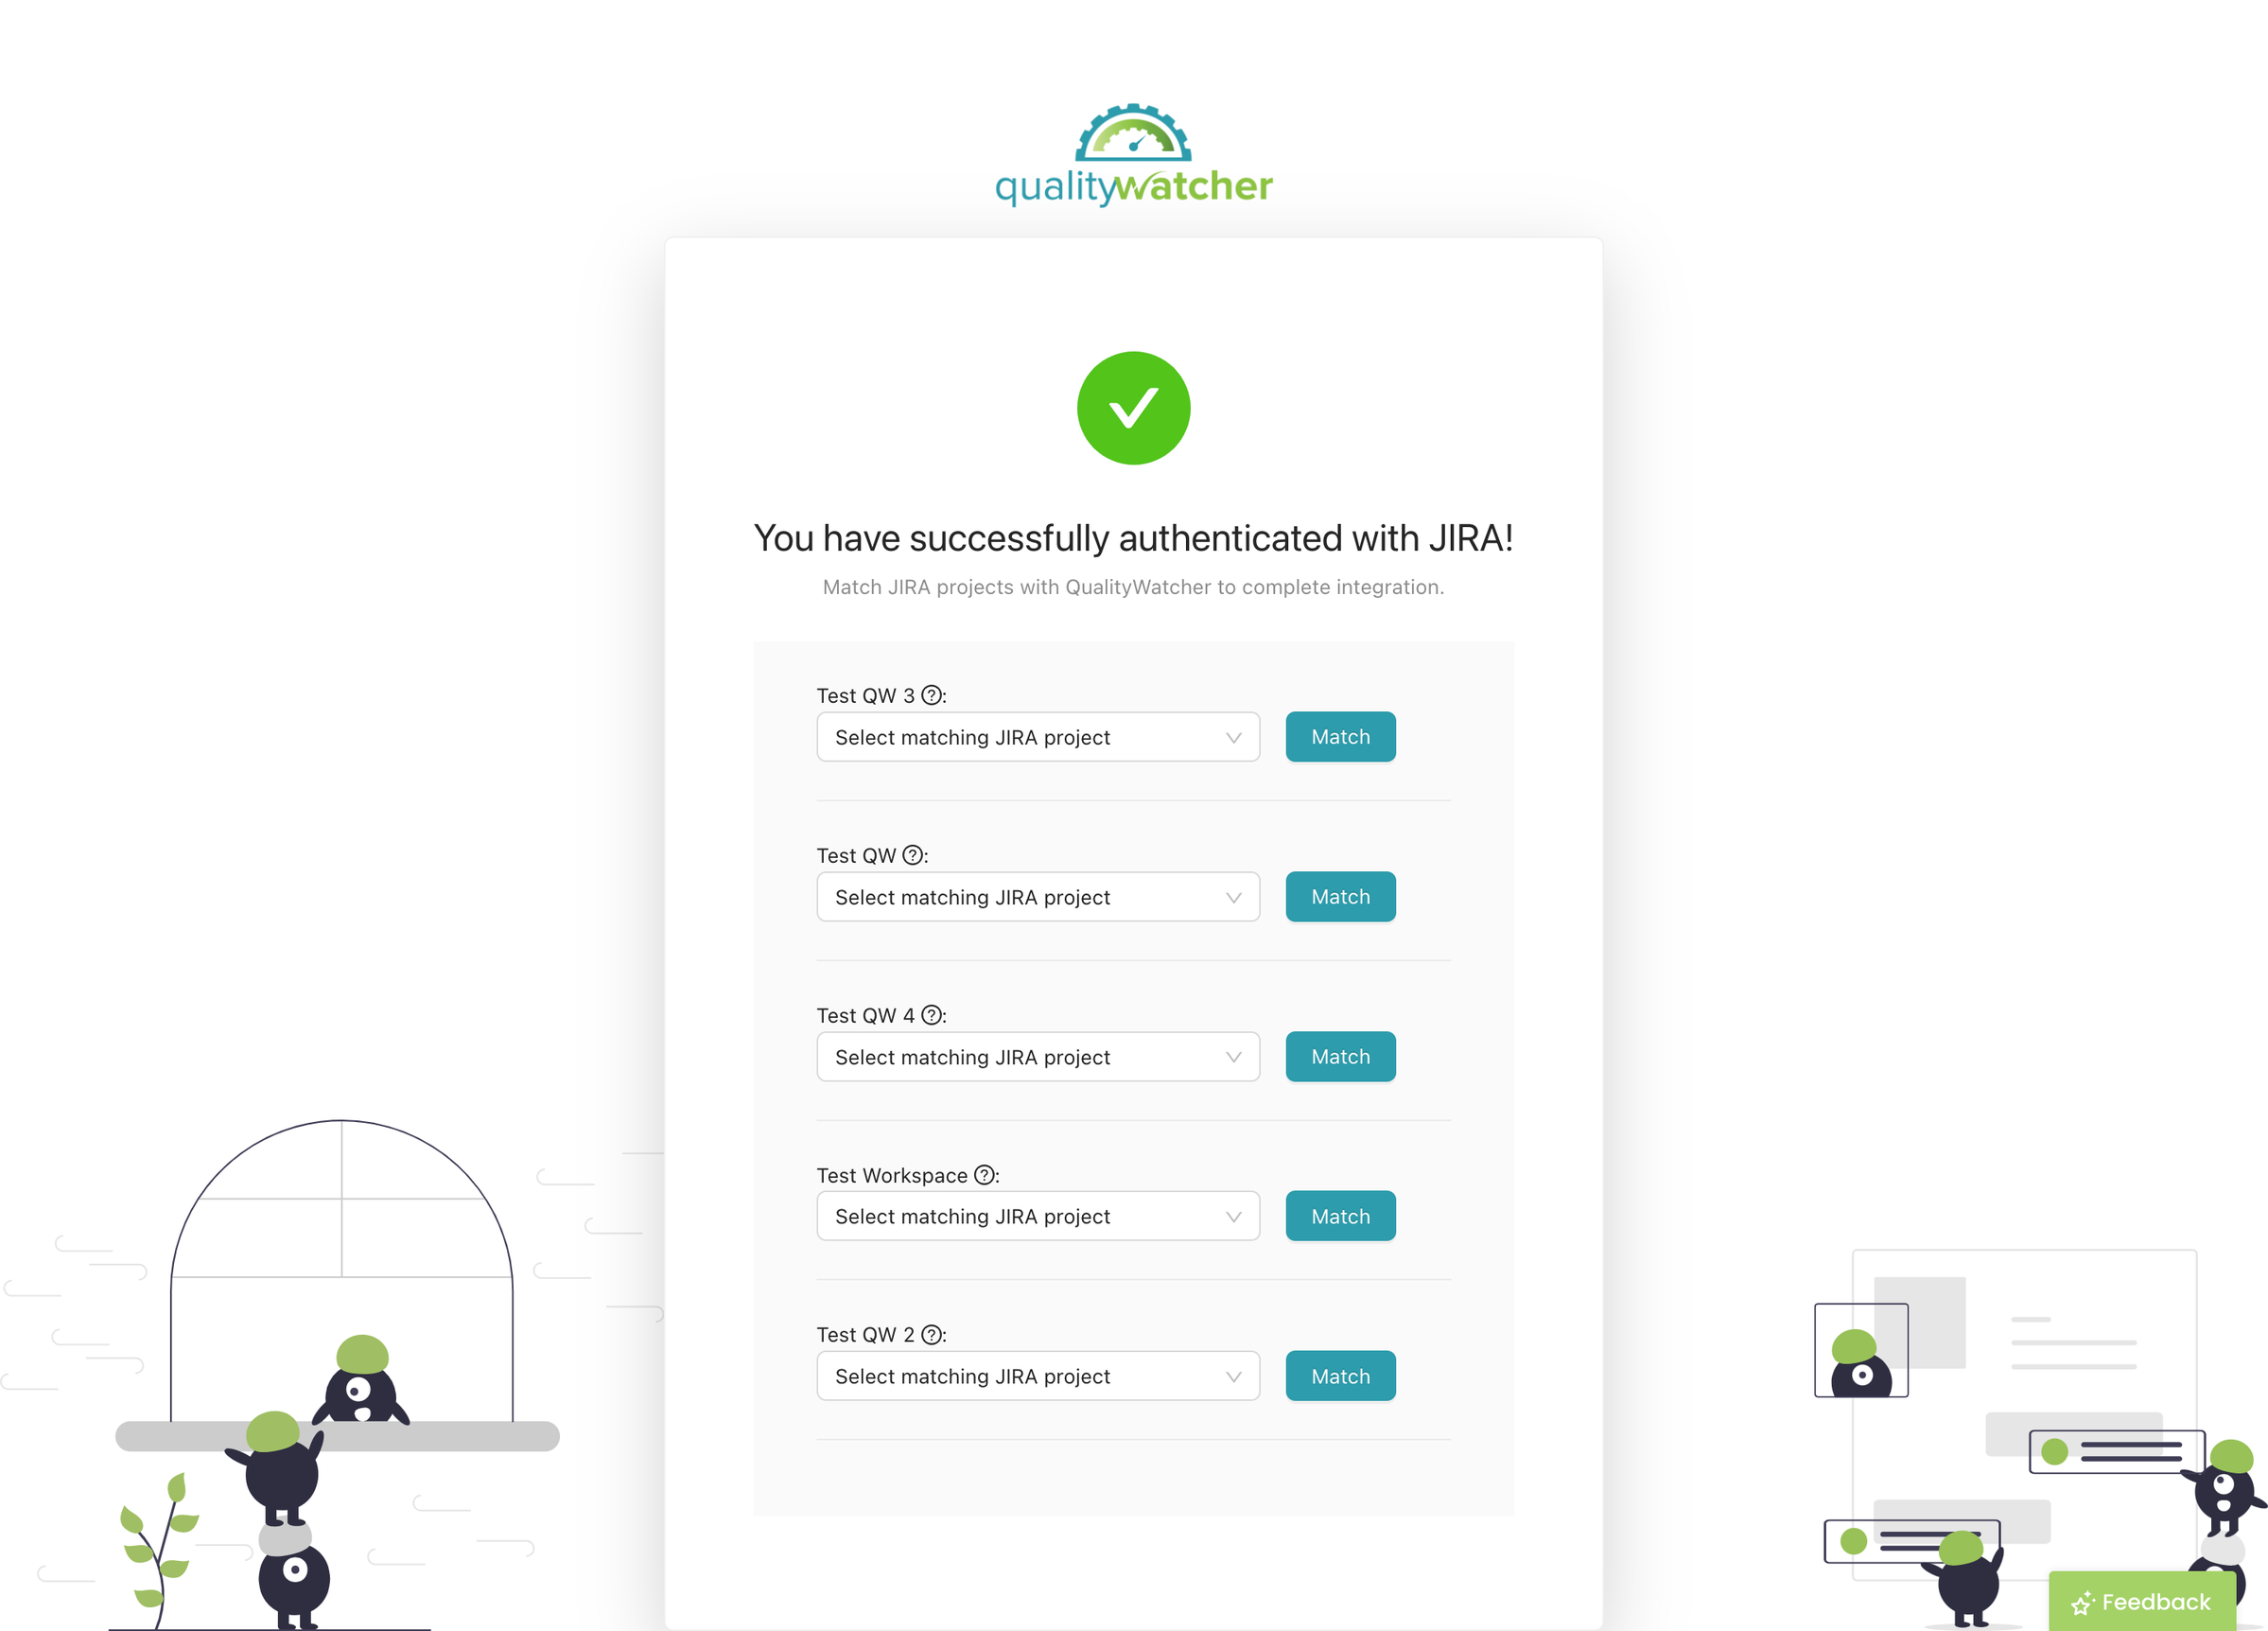
| You are now authenticated and can match your Jira project(s) to your QualityWatcher project(s) then click the “Match” button to confirm your selections. |
 |
|---|
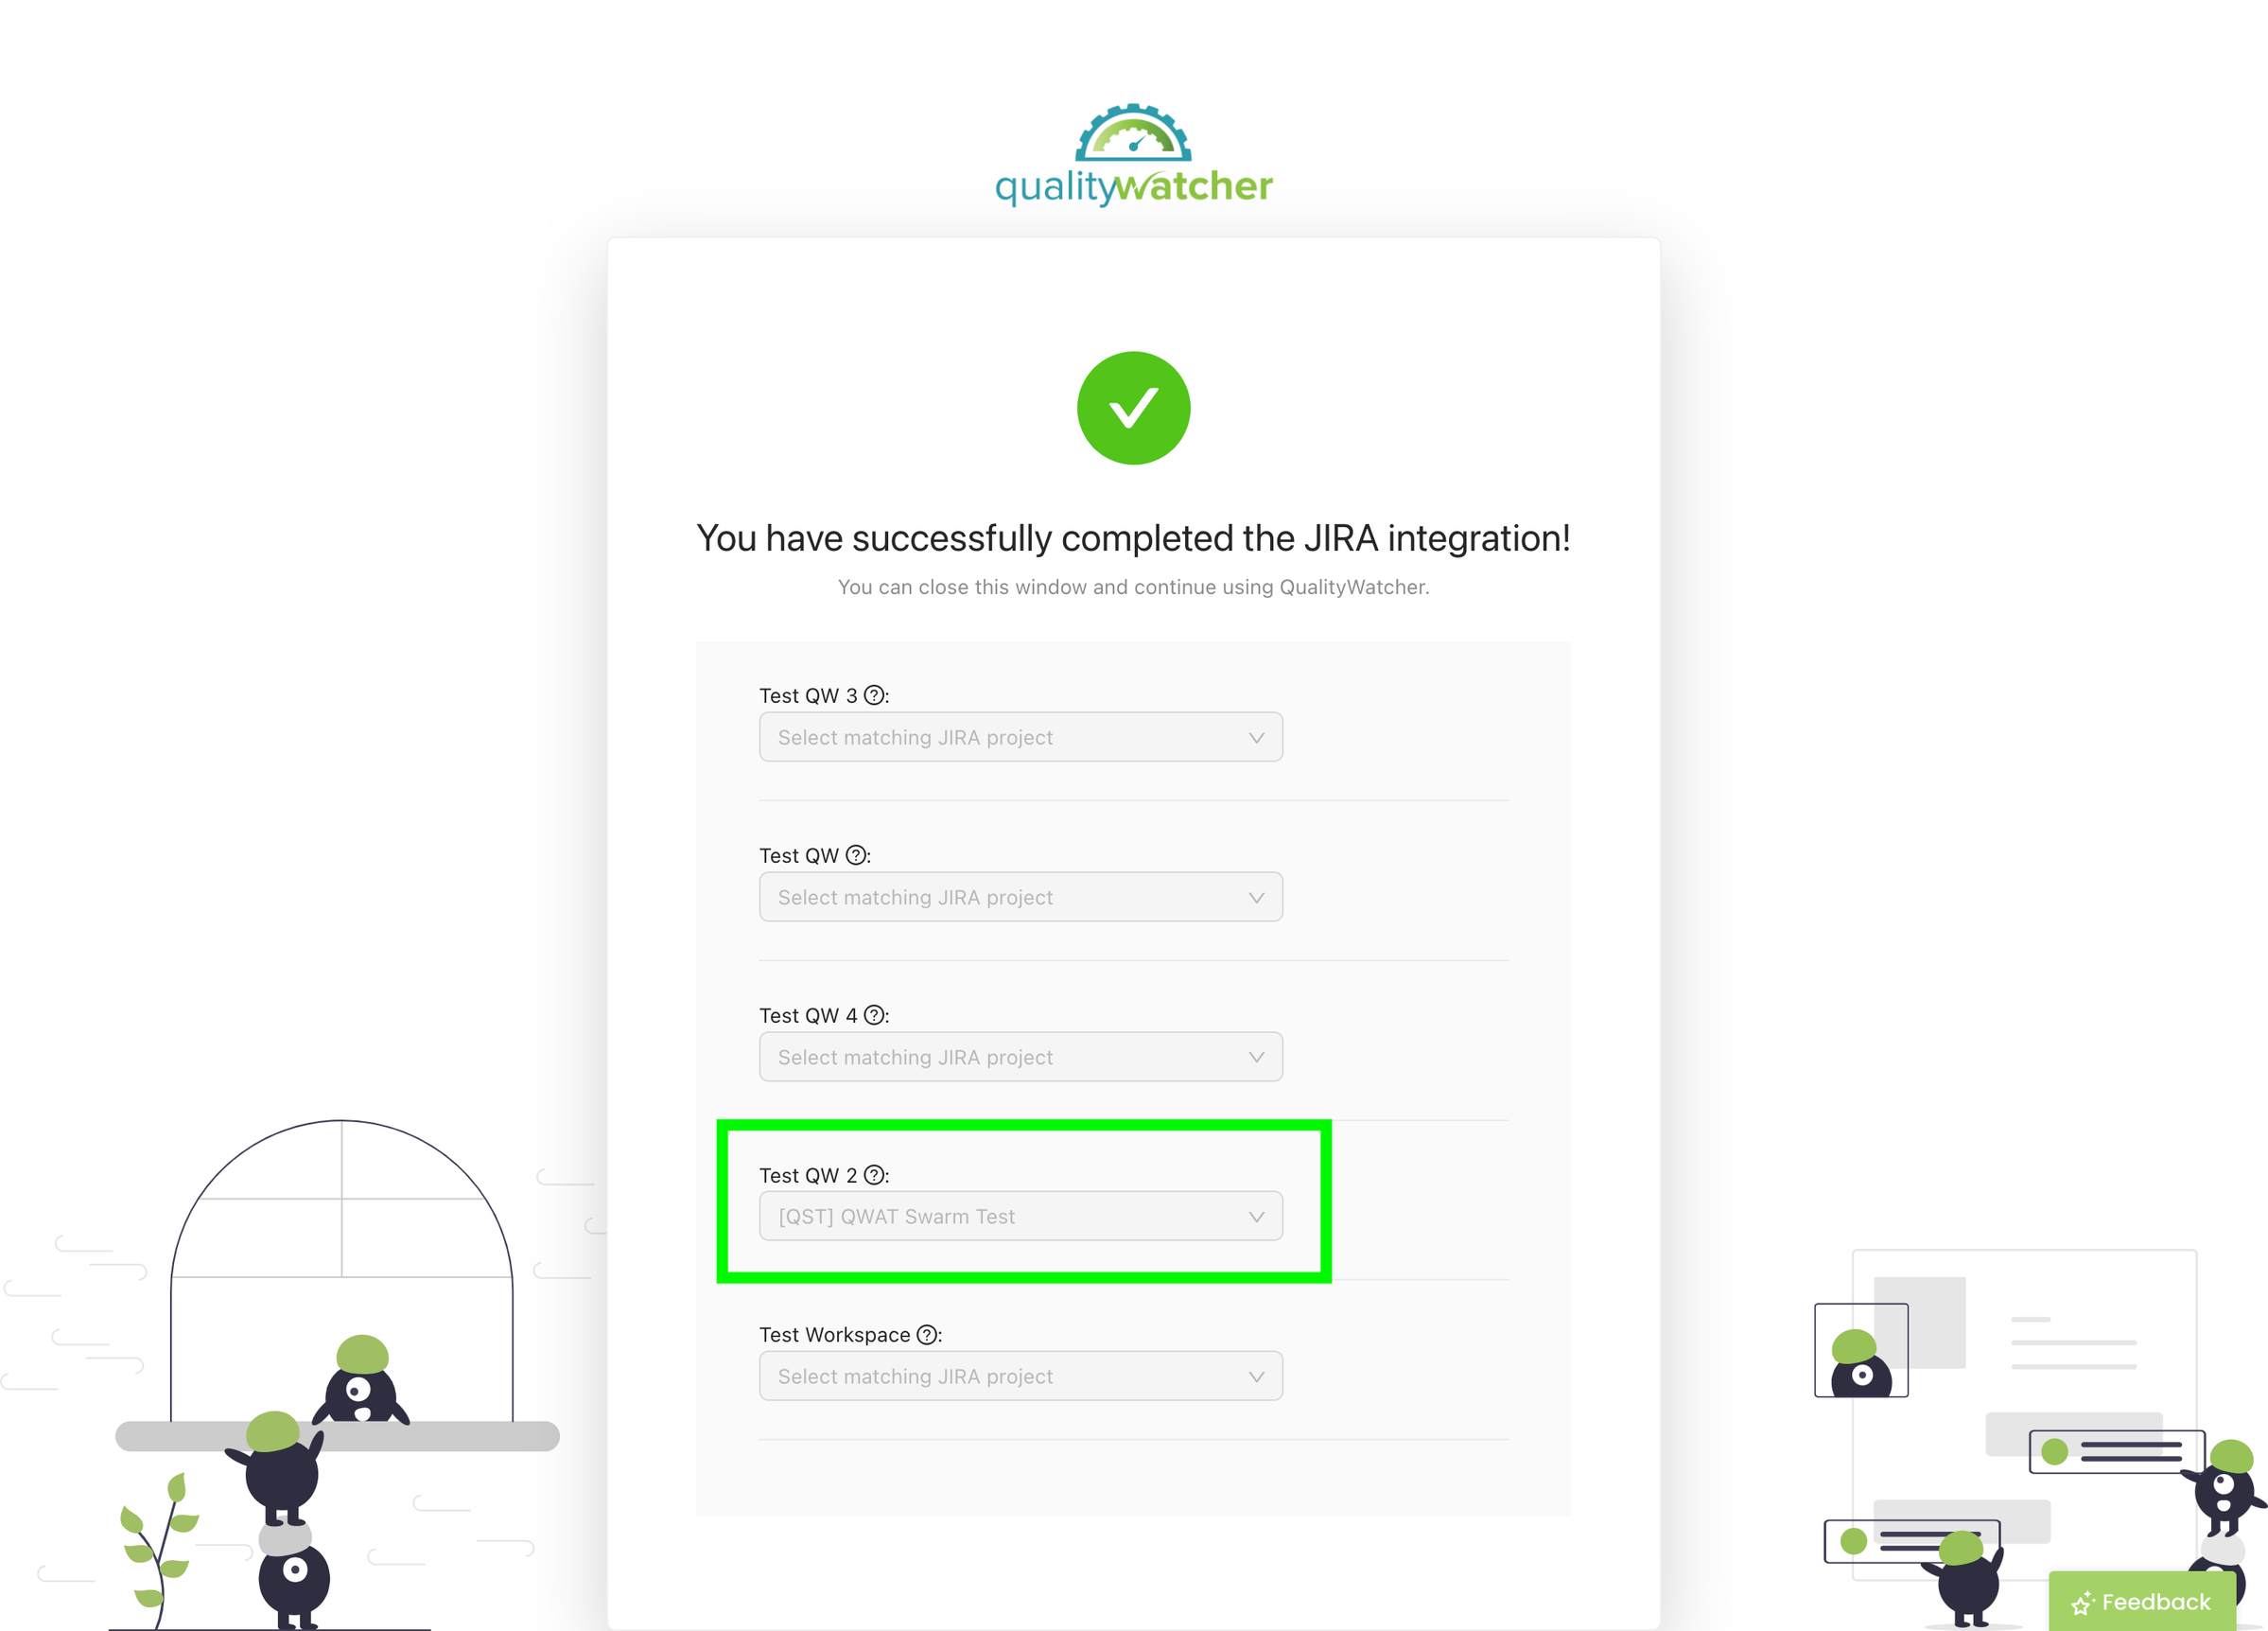
| Successfully matched your projects and integrated Jira into your workspace. |
Jira Non Admin Setup
First, you must be logged in as a non admin user.
 |
|---|
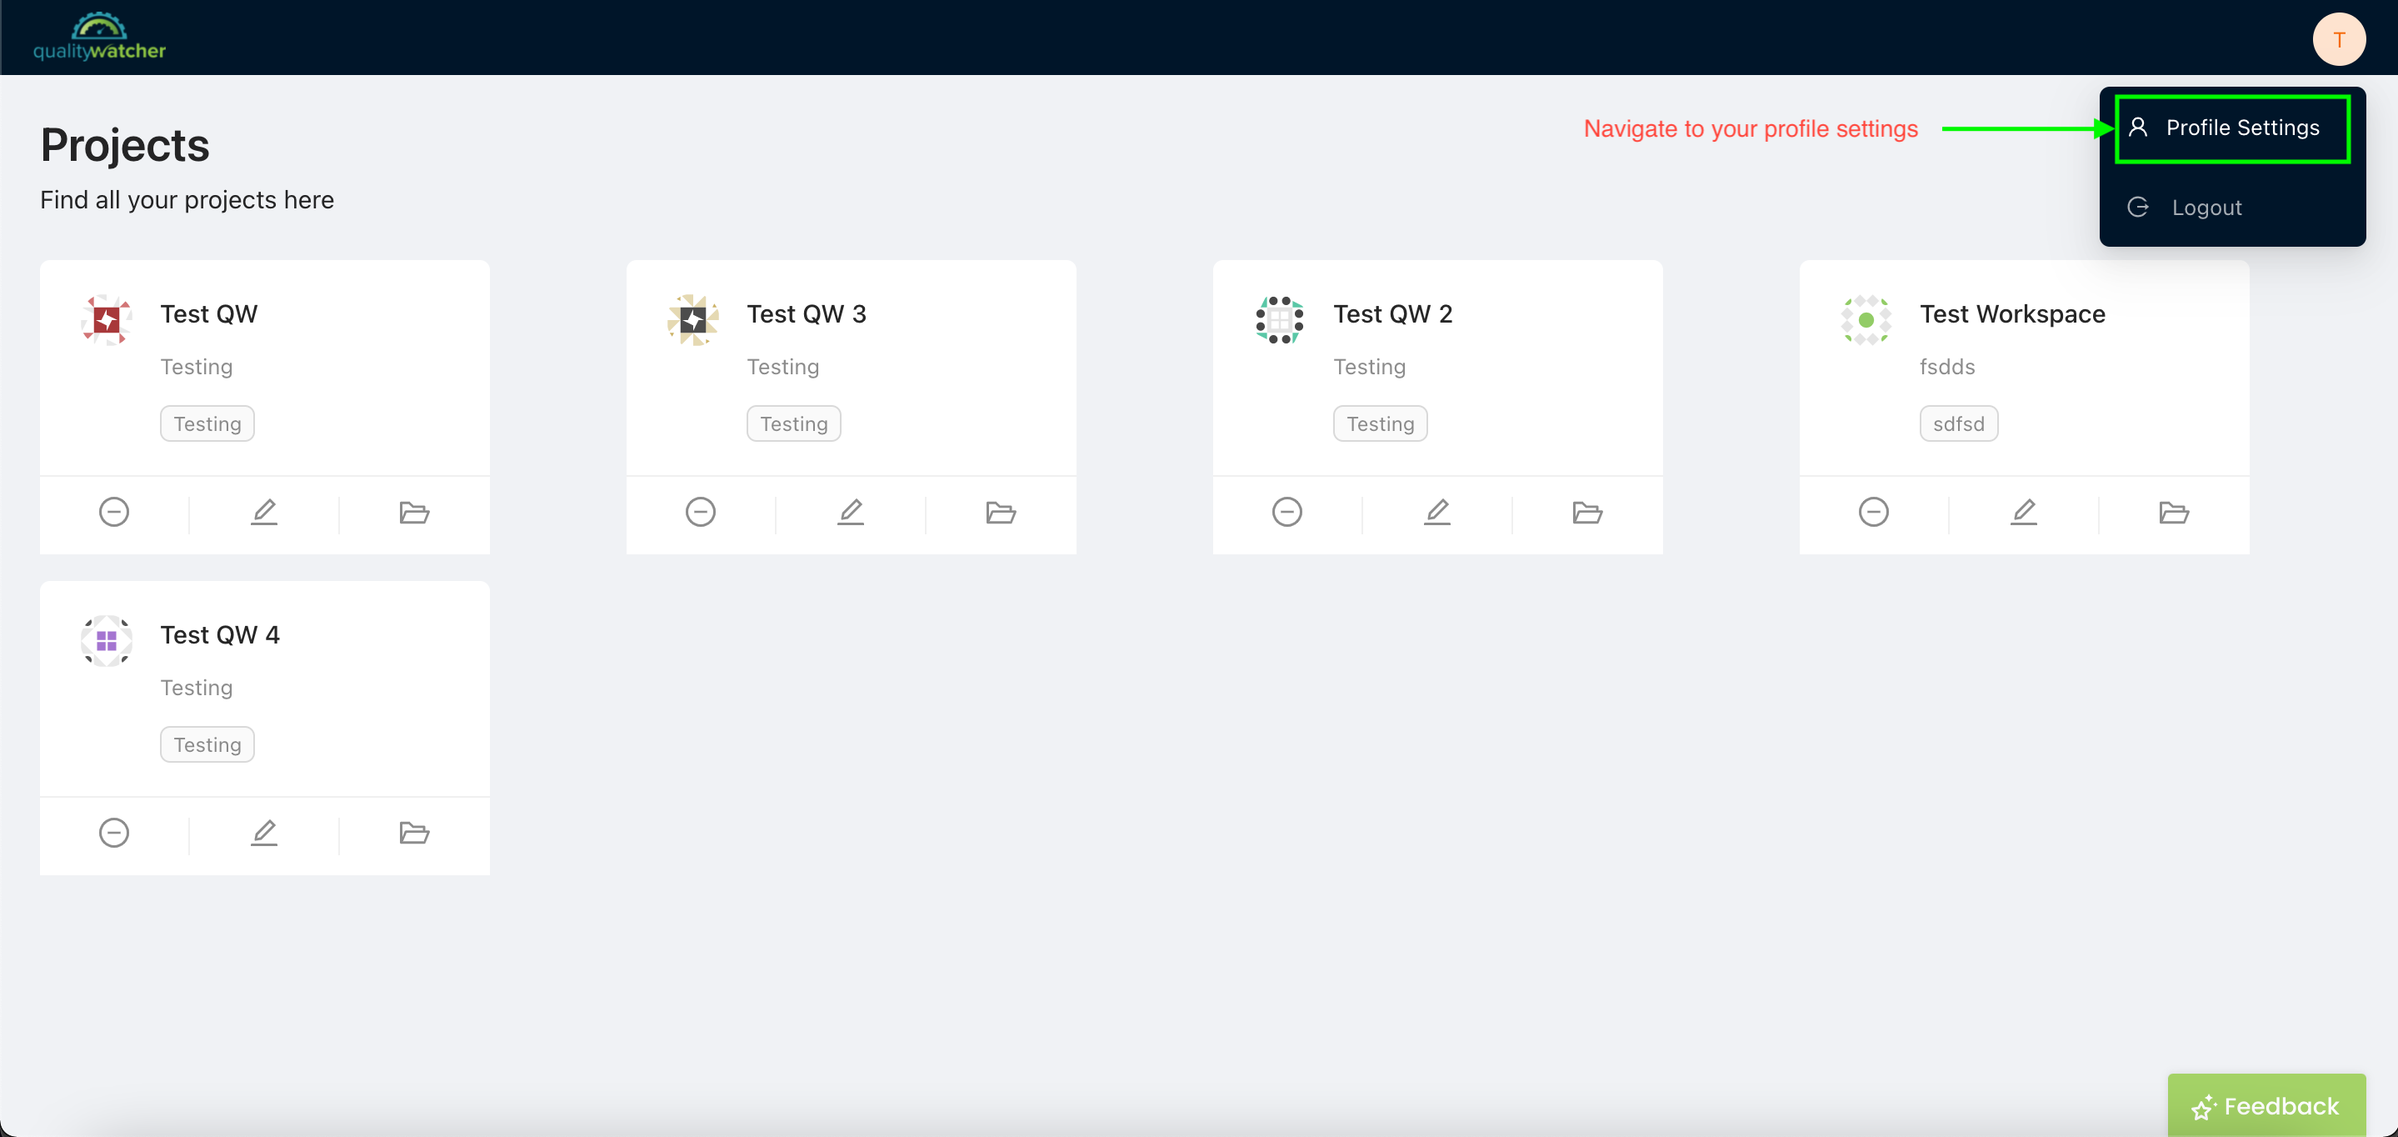
| Navigate to and open your profile settings. |
 |
|---|
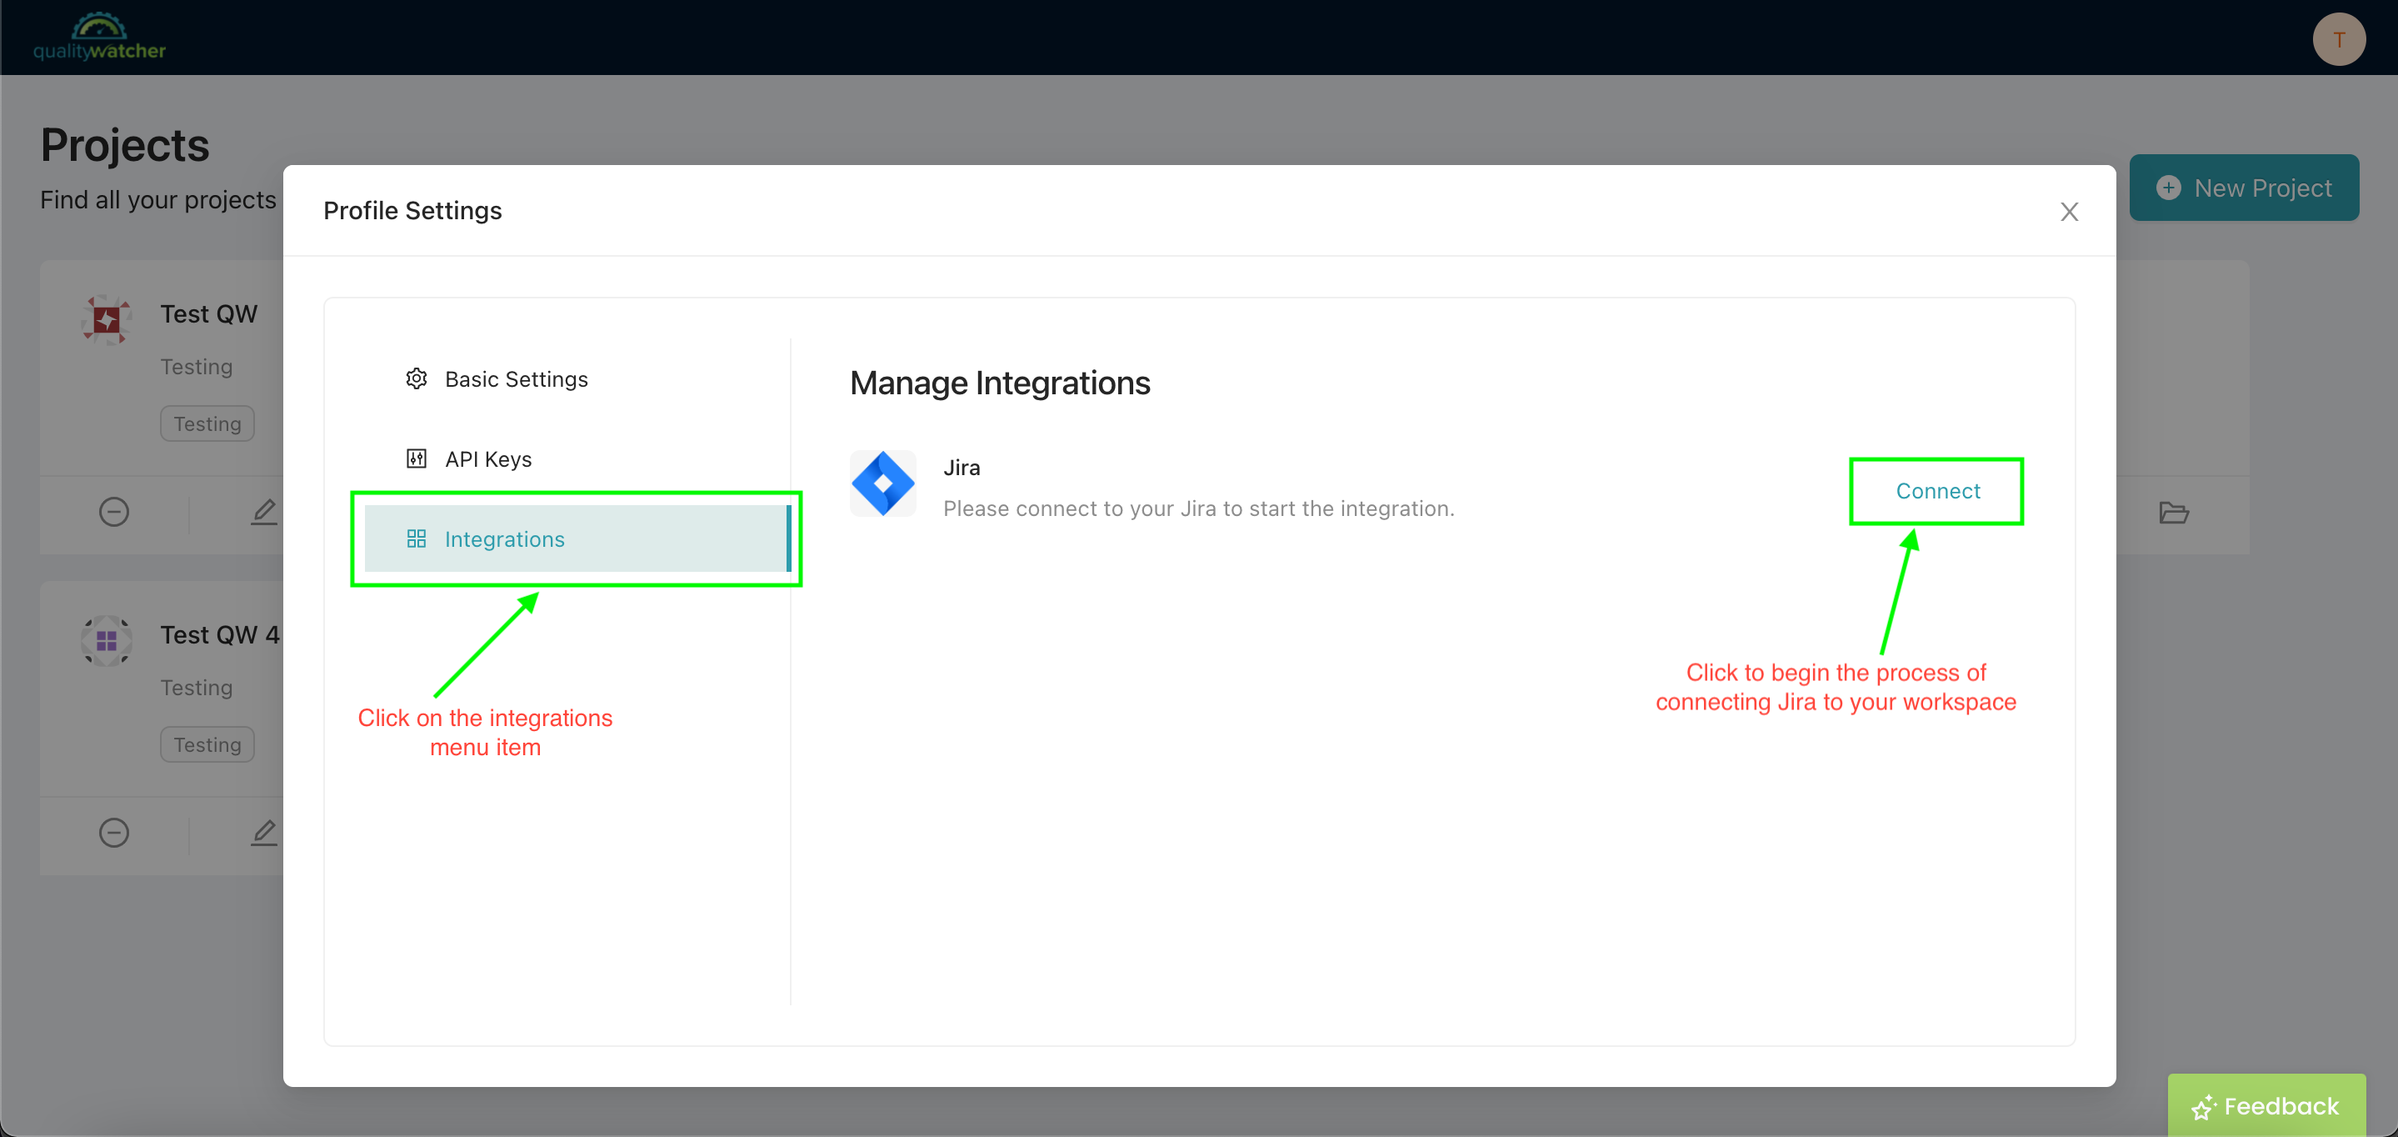
| Once you’re within your profile settings, you will need to navigate and open the “Integrations” menu. Click “Connect” to begin your Jira integration process. |
 |
|---|
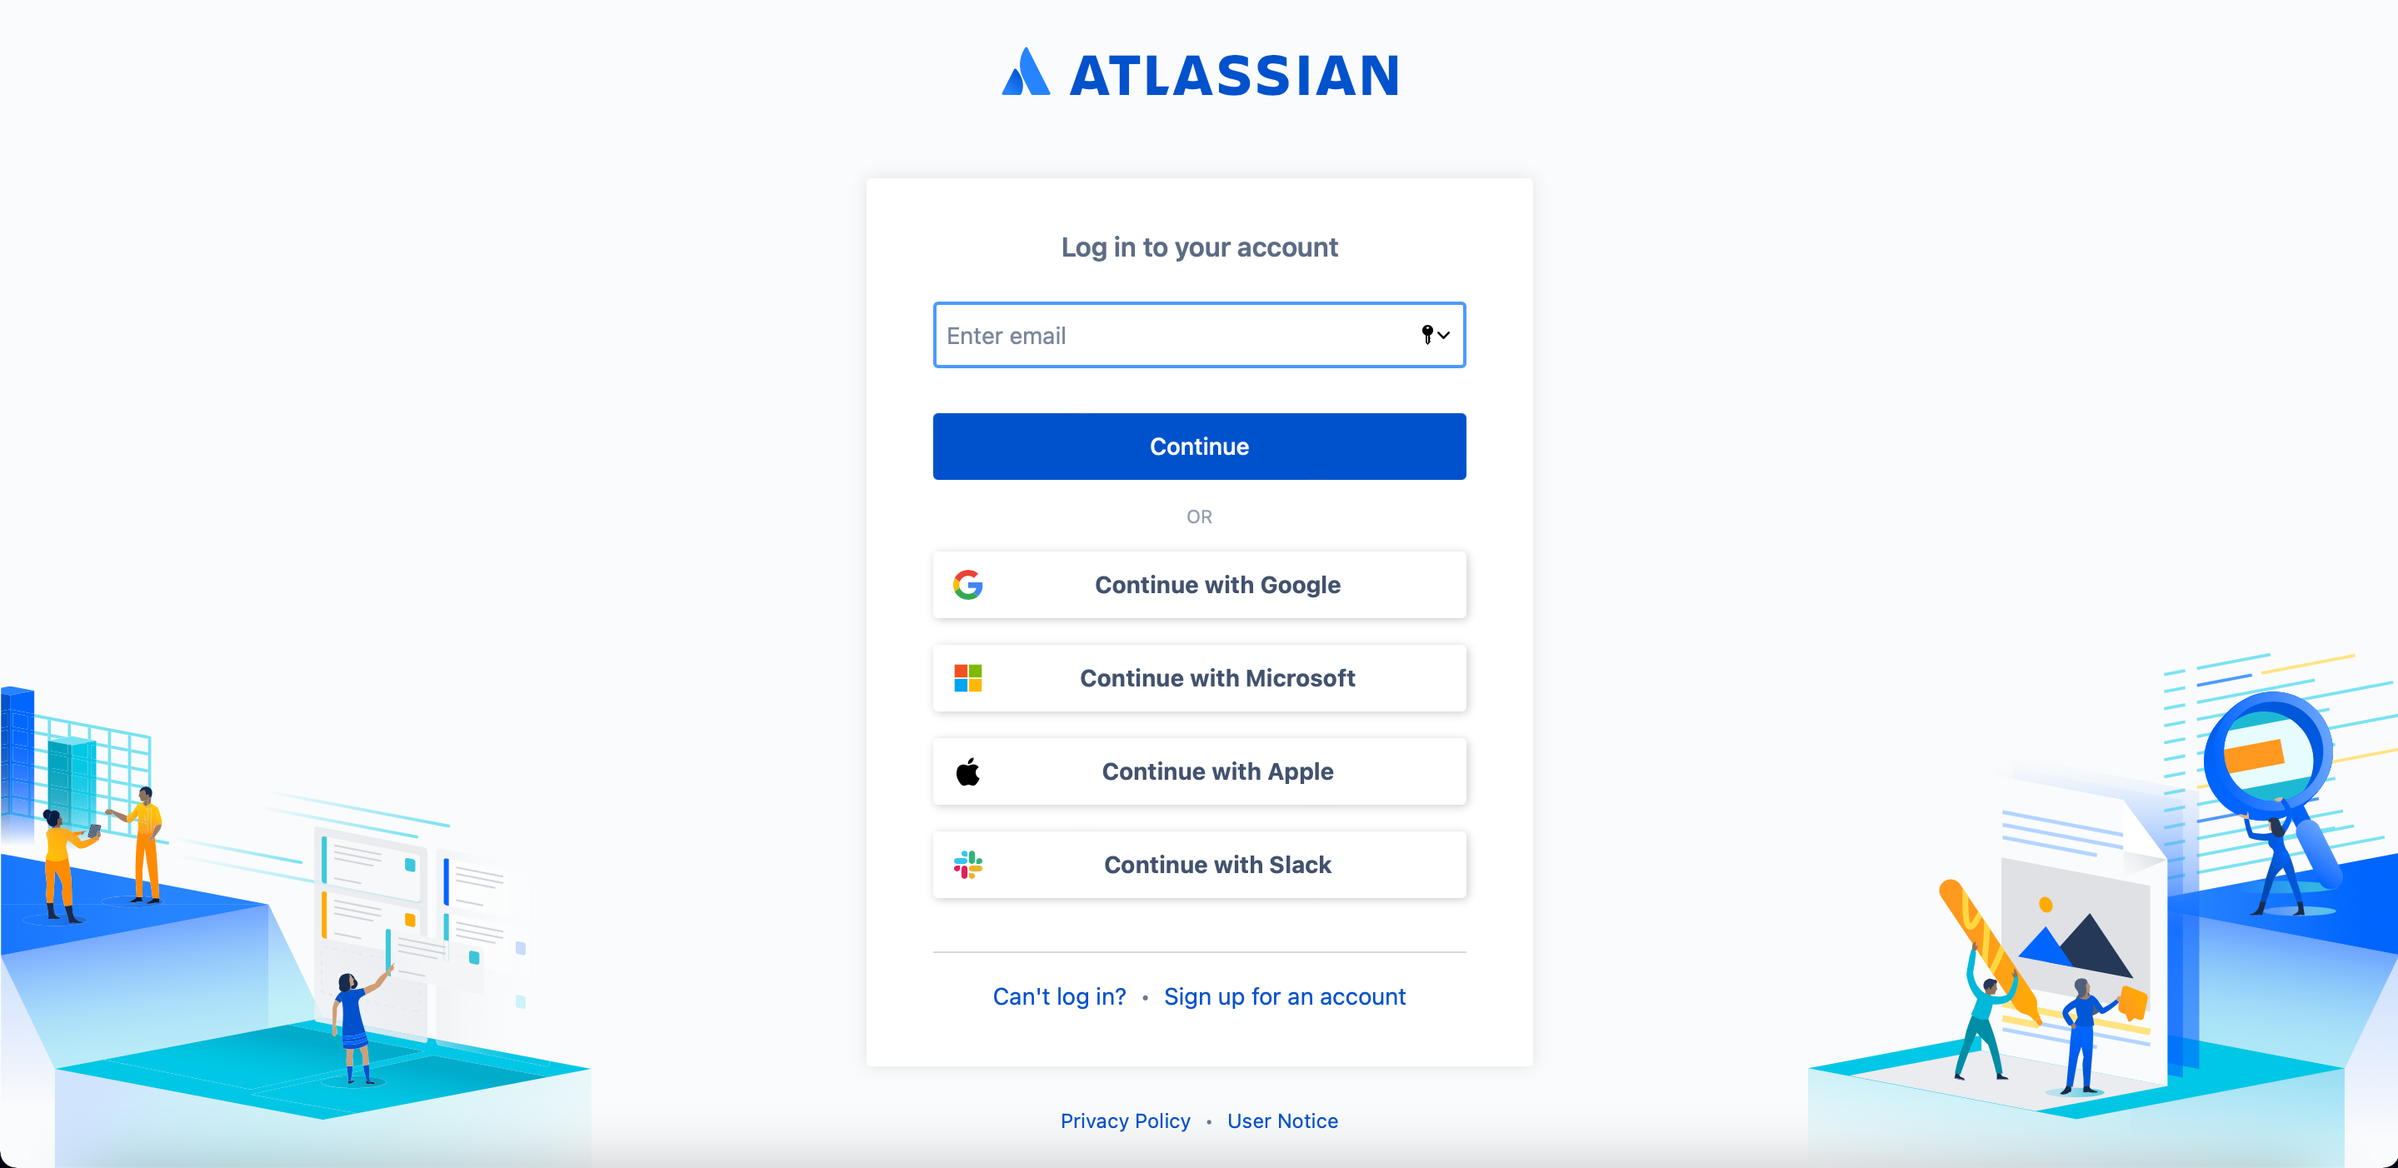
| Once the “Connect” is clicked, a new tab will be open with this screen if you’re not currently logged in to your Jira account. You will need to login and then you will be brought to the screen displayed below. |
 |
|---|
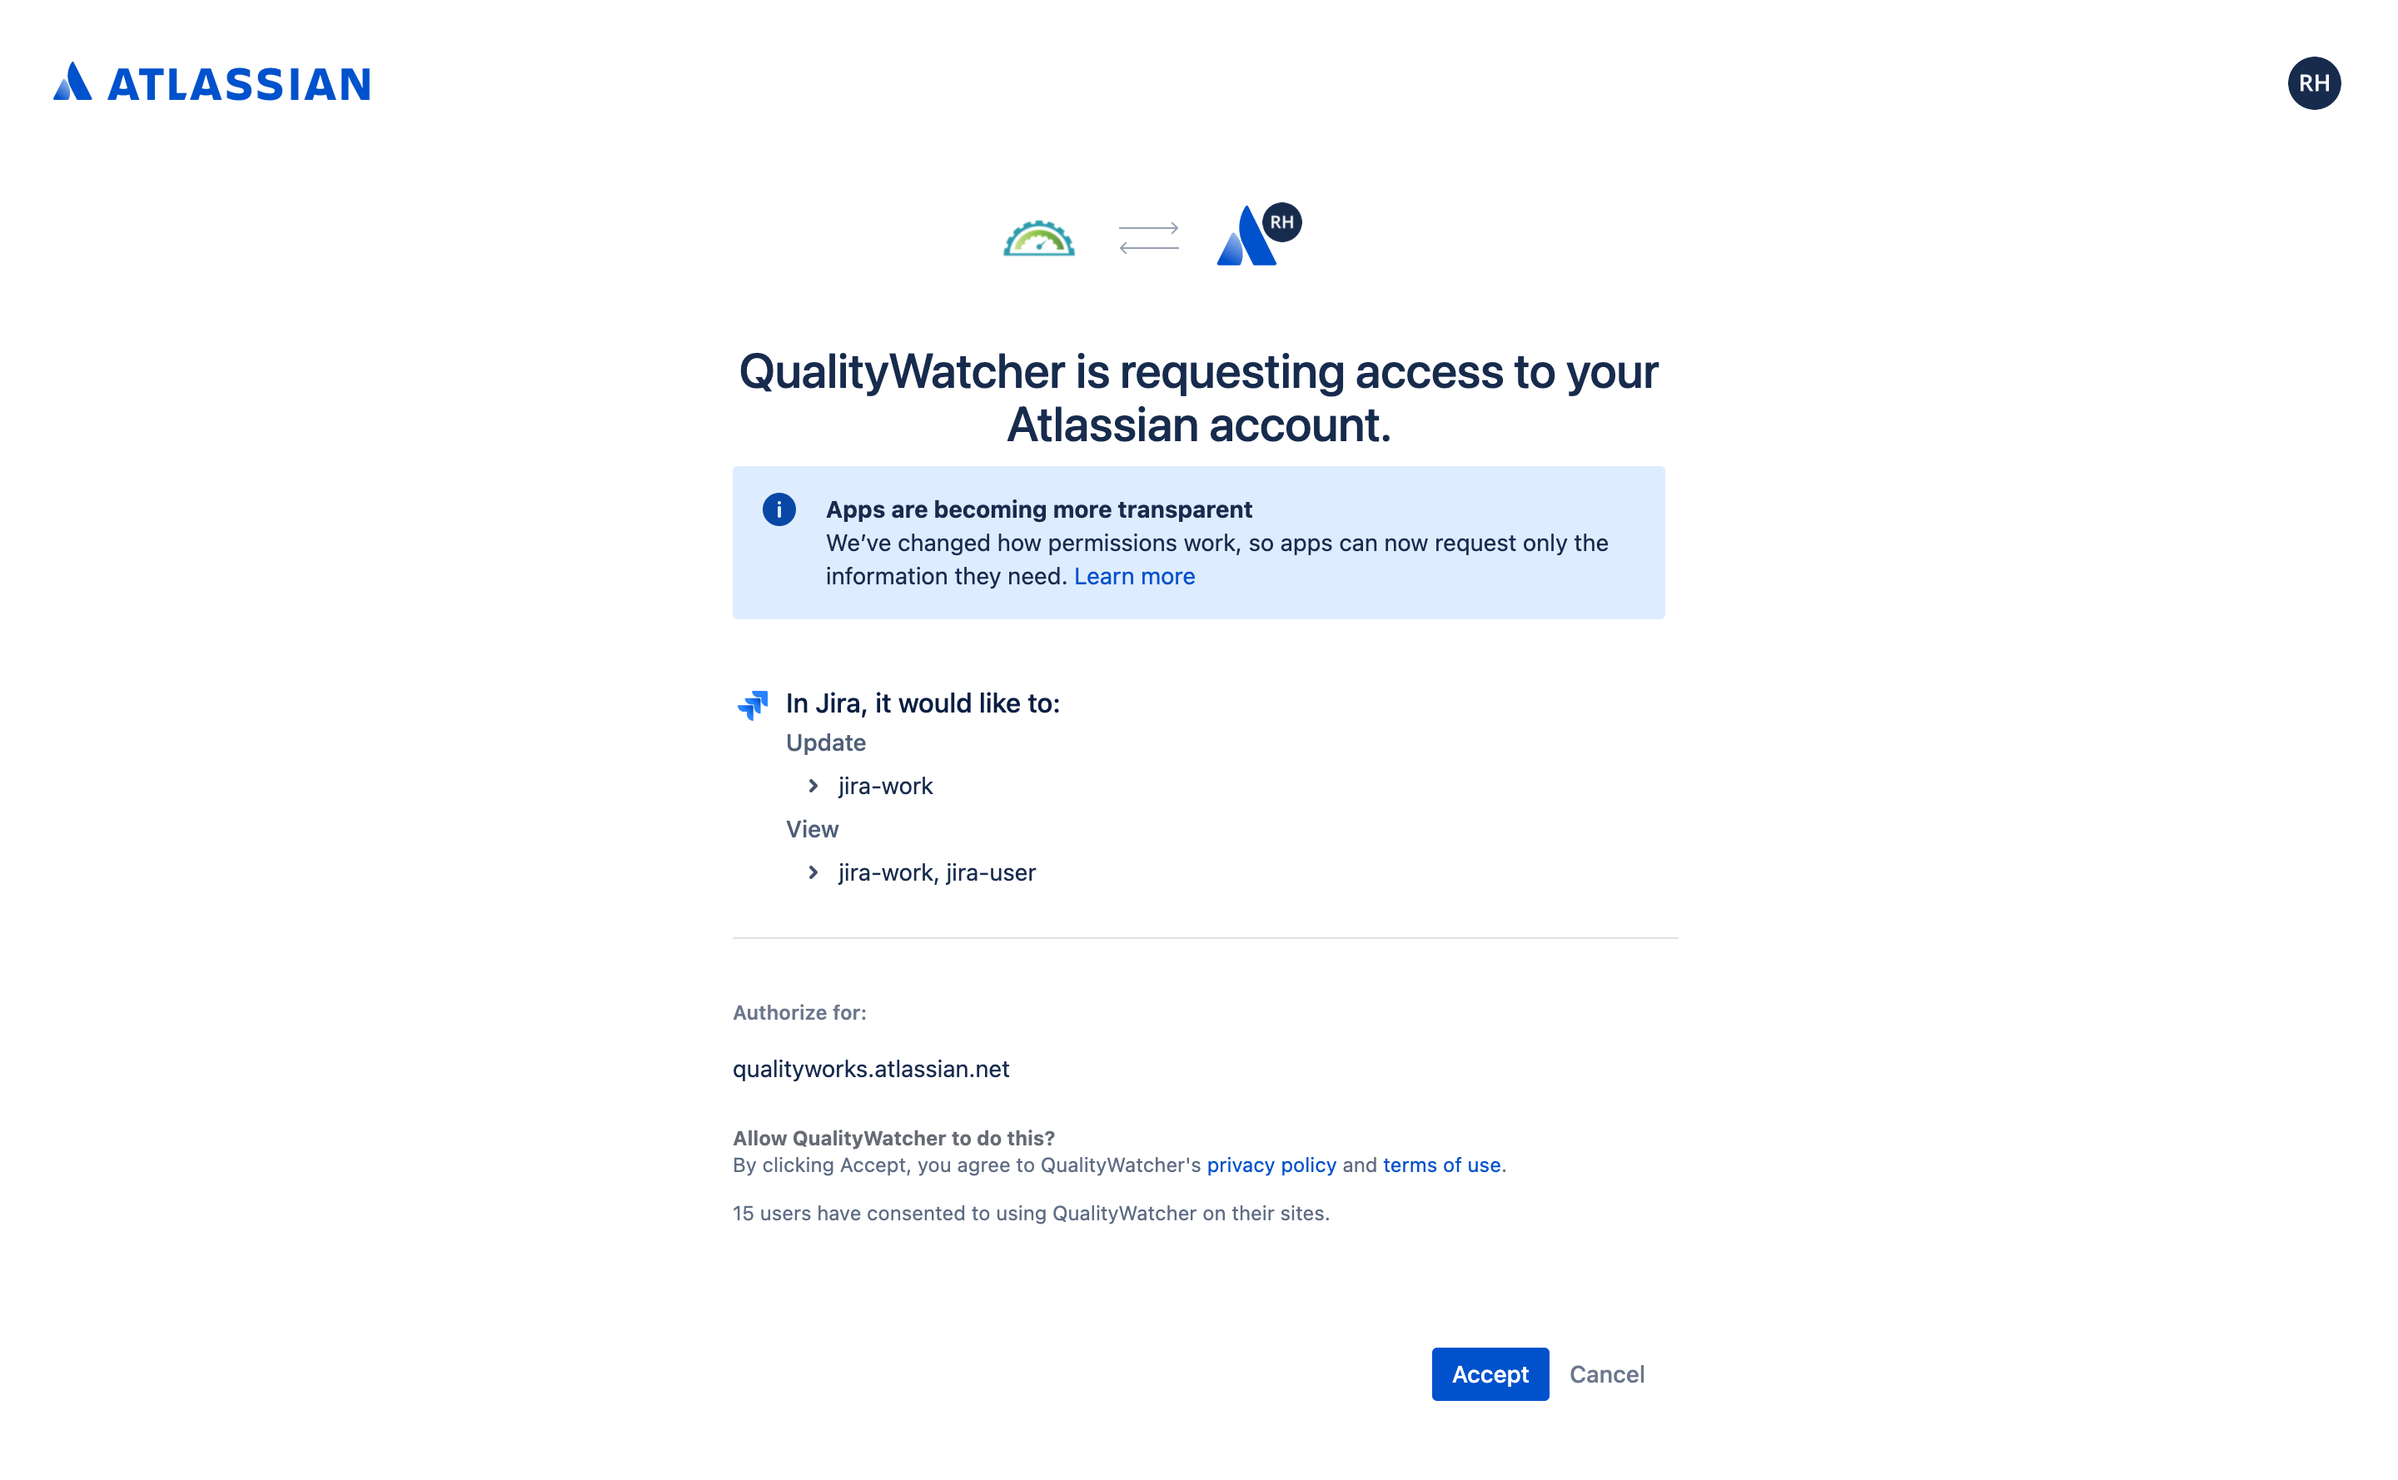
| Once the “Connect” is clicked, a new tab will be open with this screen if you’re currently logged in to your Jira account. Click “Accept” to give QualityWatcher access to your Atlassian account(Jira). |
 |
|---|
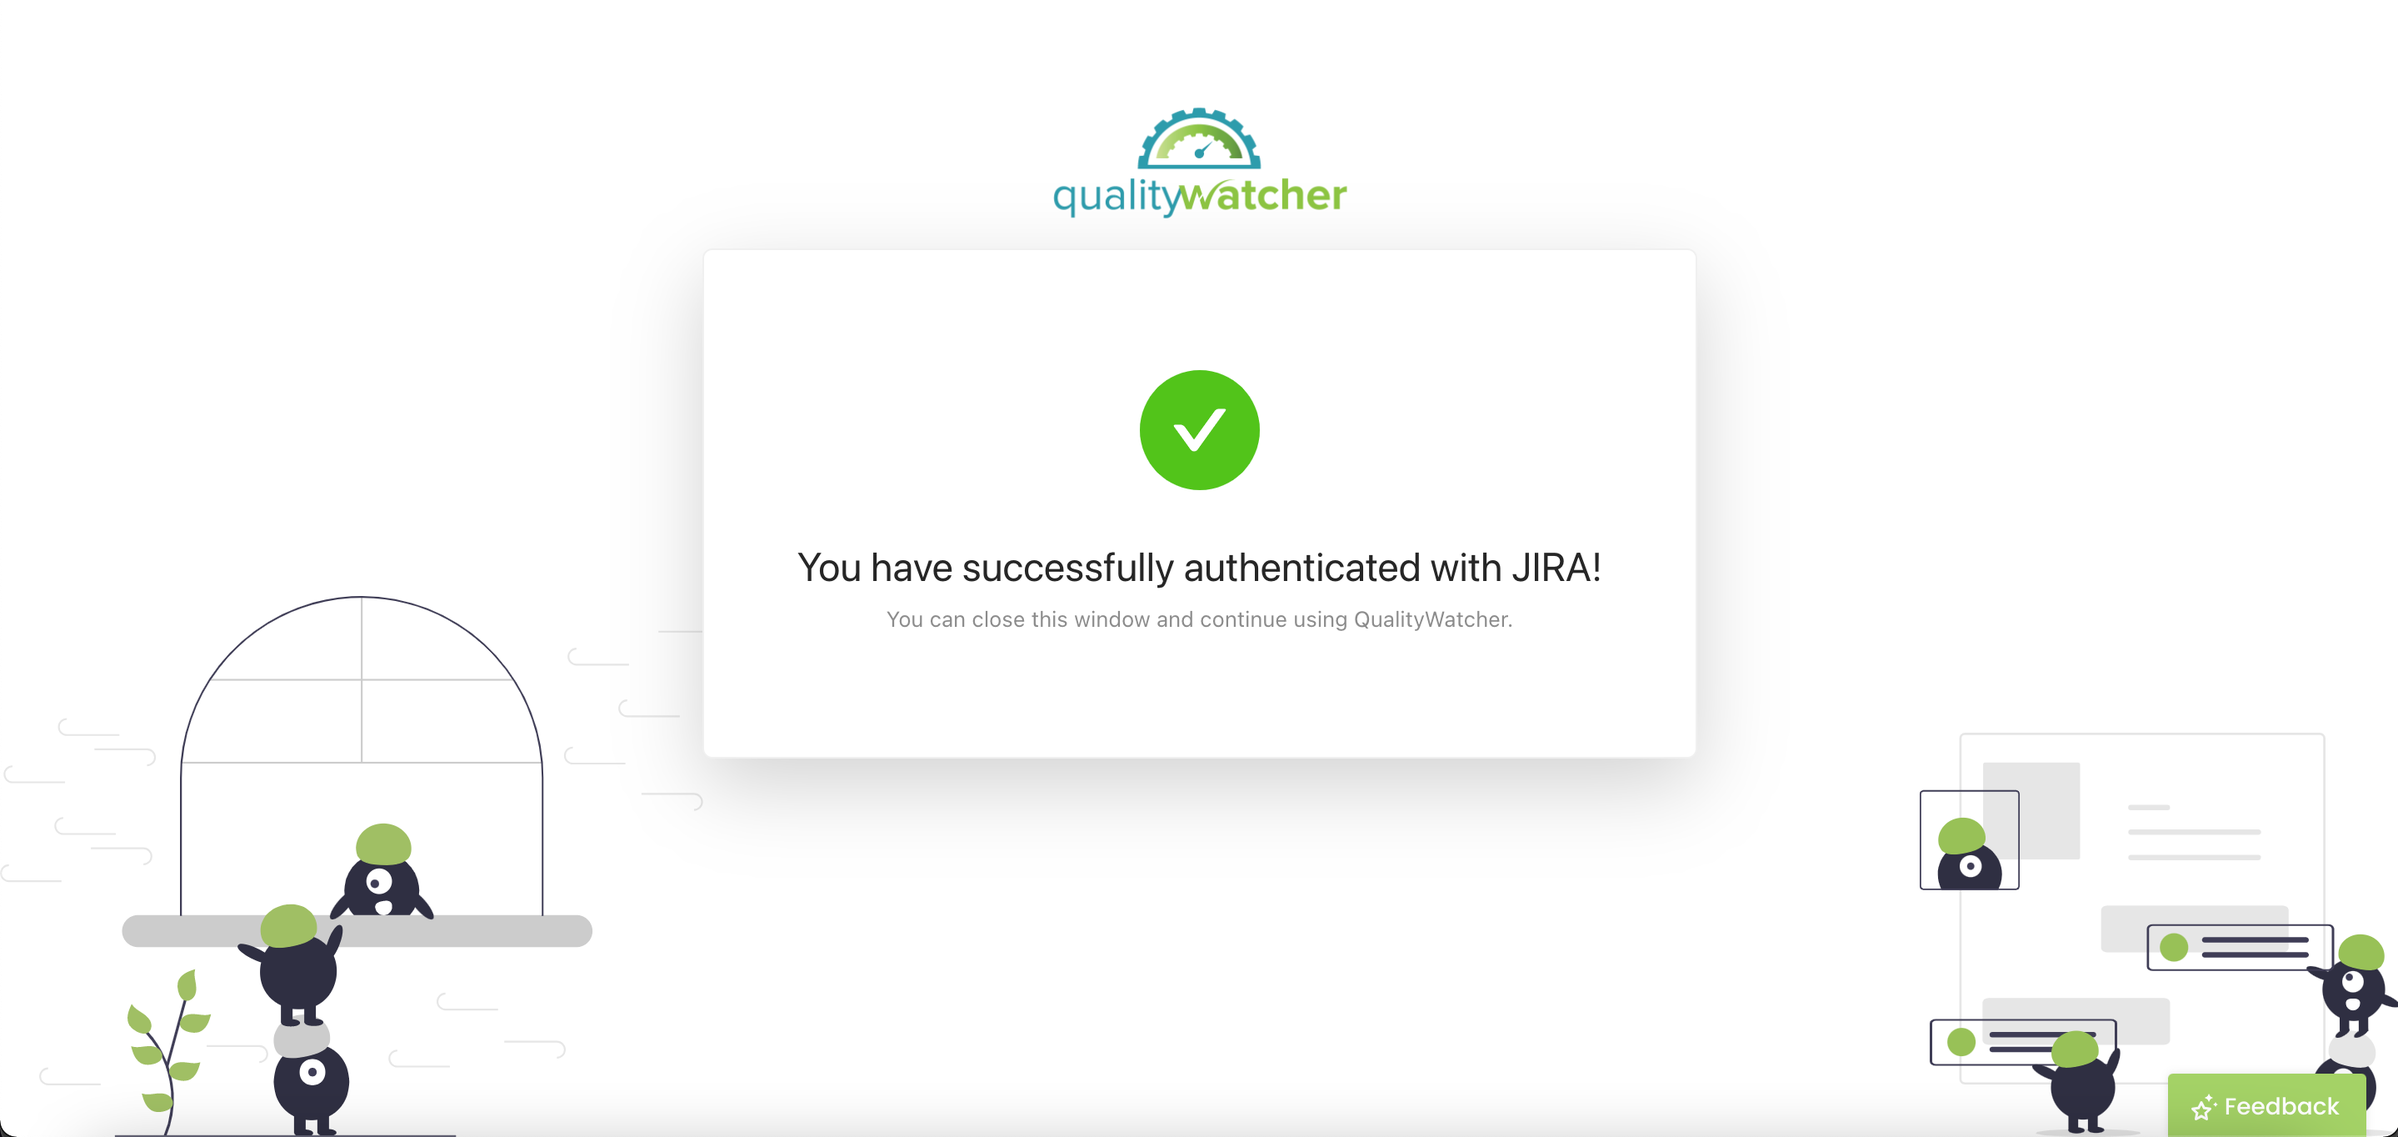
| Successfully integrated Jira into your workspace. As a non admin you are not shown the screen to match your Jira projects to your QualityWorks projects since the admin account already completed that process. |
Linking QualityWatcher Test Cases to Jira Tickets
 |
|---|
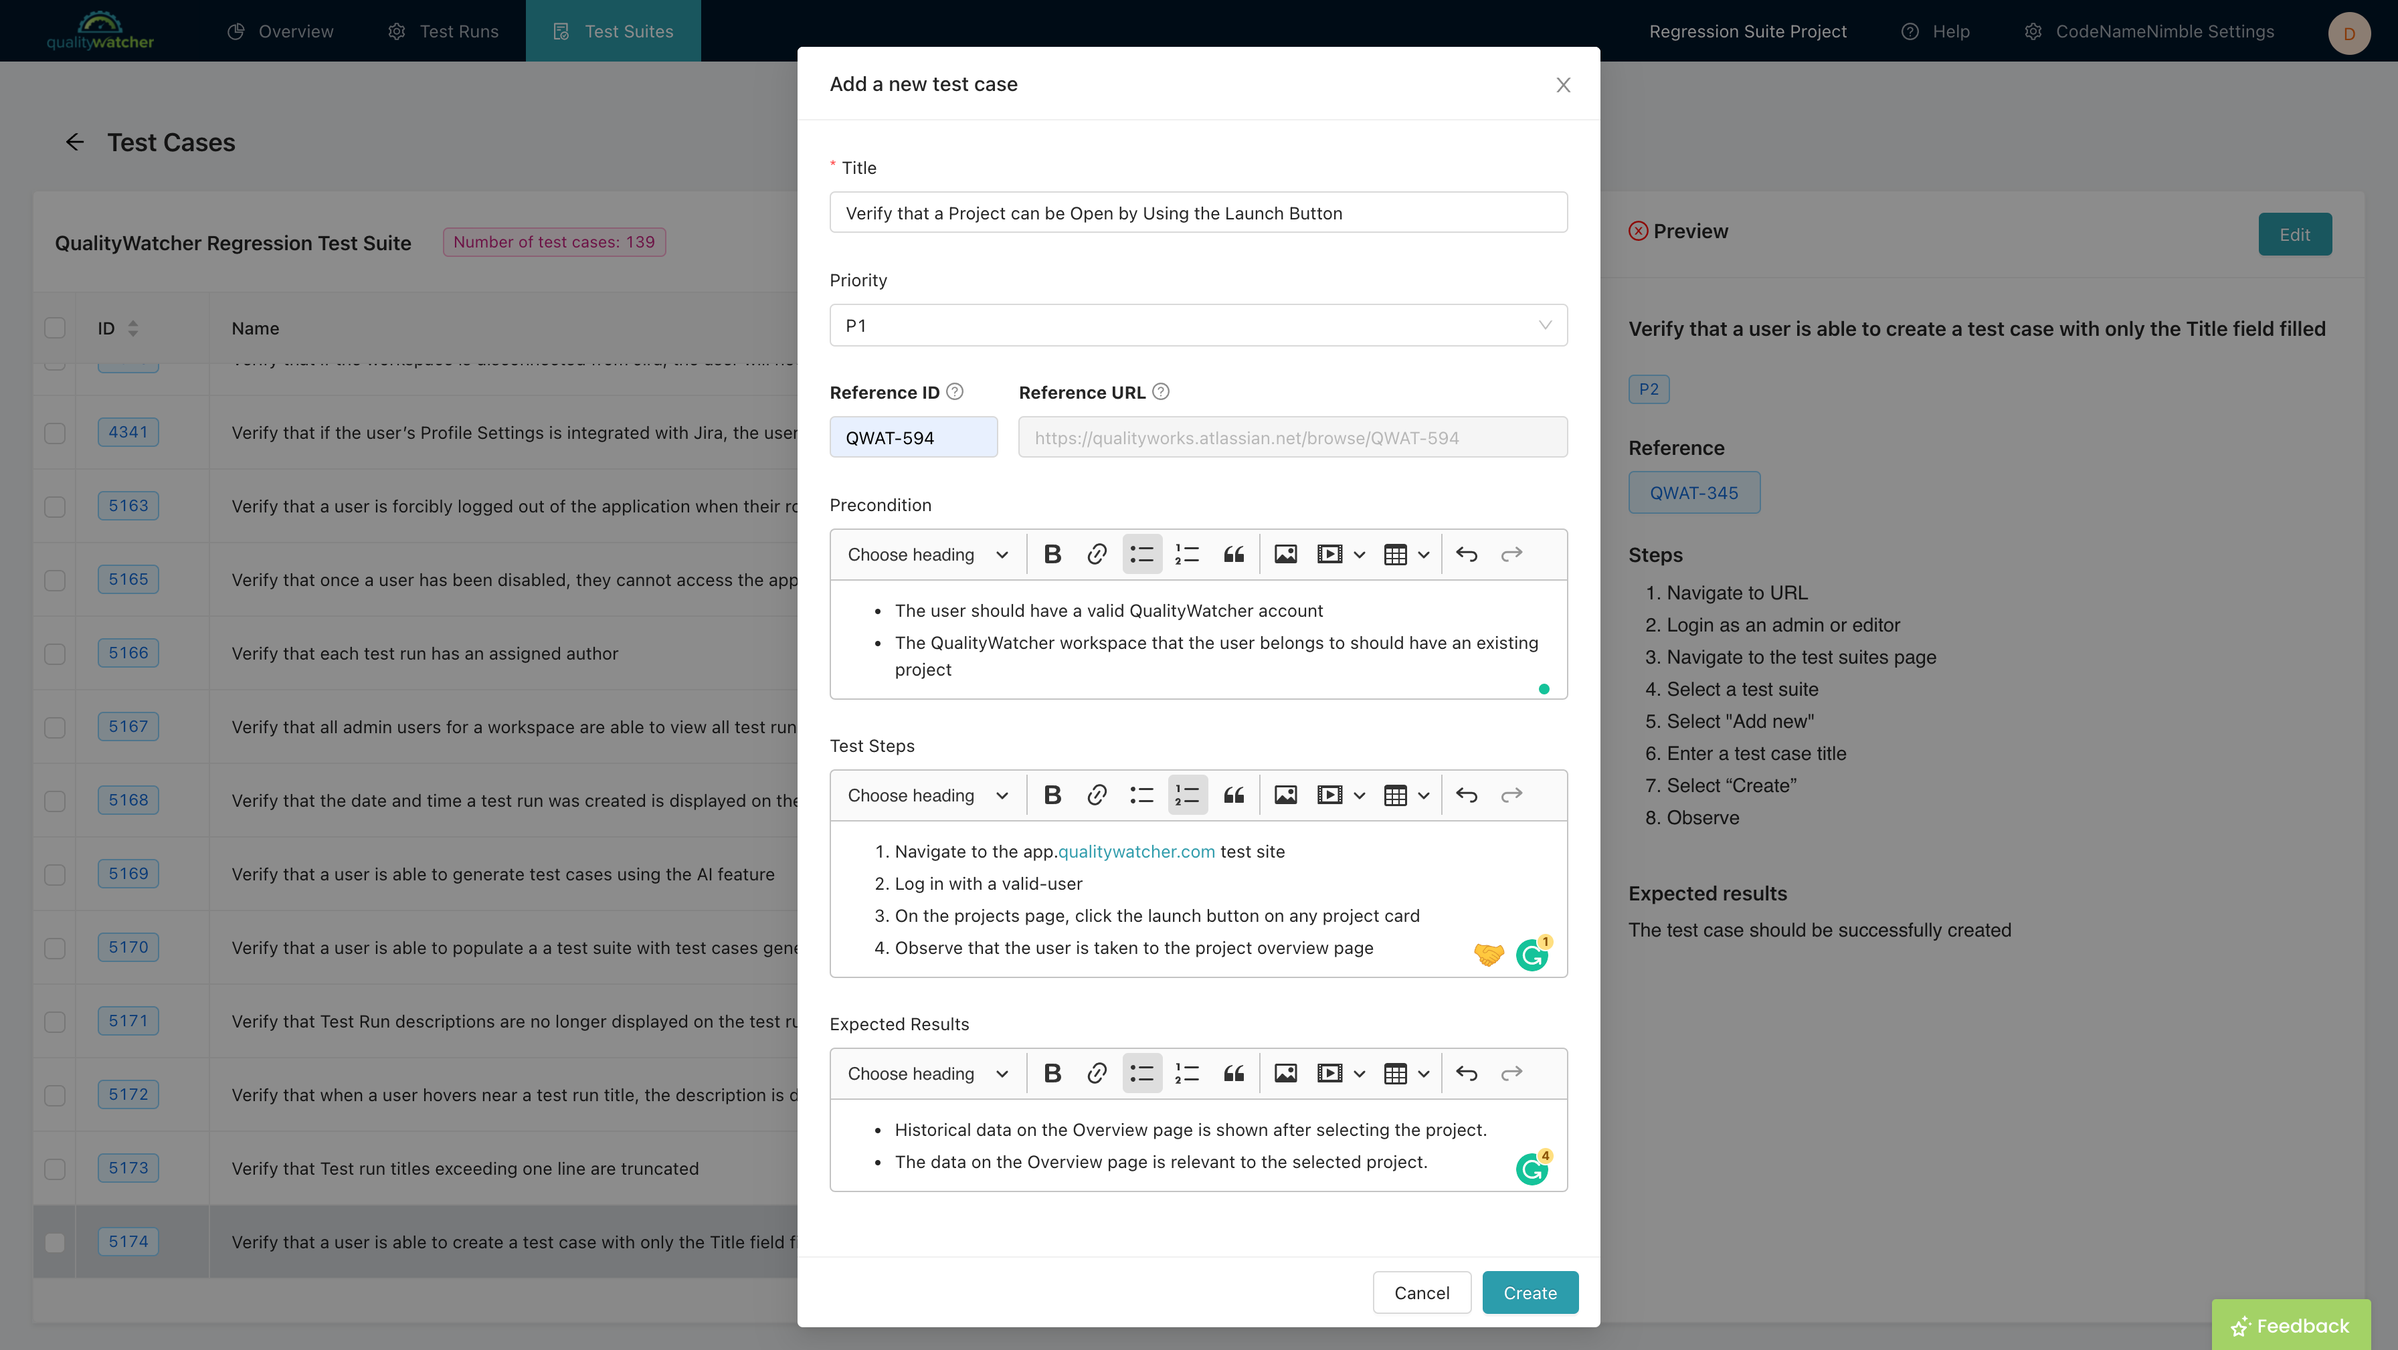
| Adding a Reference ID in QualityWatcher. |
Linking test cases to your requirements, user stories, or specification documents can make it easier for testers to learn more about the case’s context. You can supply each test case with a Reference ID and URL.
info
Reference URL: https://qualityworks.atlassian.net/browse/SOS-1234 (if Jira is integrated, this field will auto-populate)
The Reference ID normally is included as a part of the full Reference URL.
View Linked/Referenced Jira Tickets Within QualityWatcher
 |
|---|
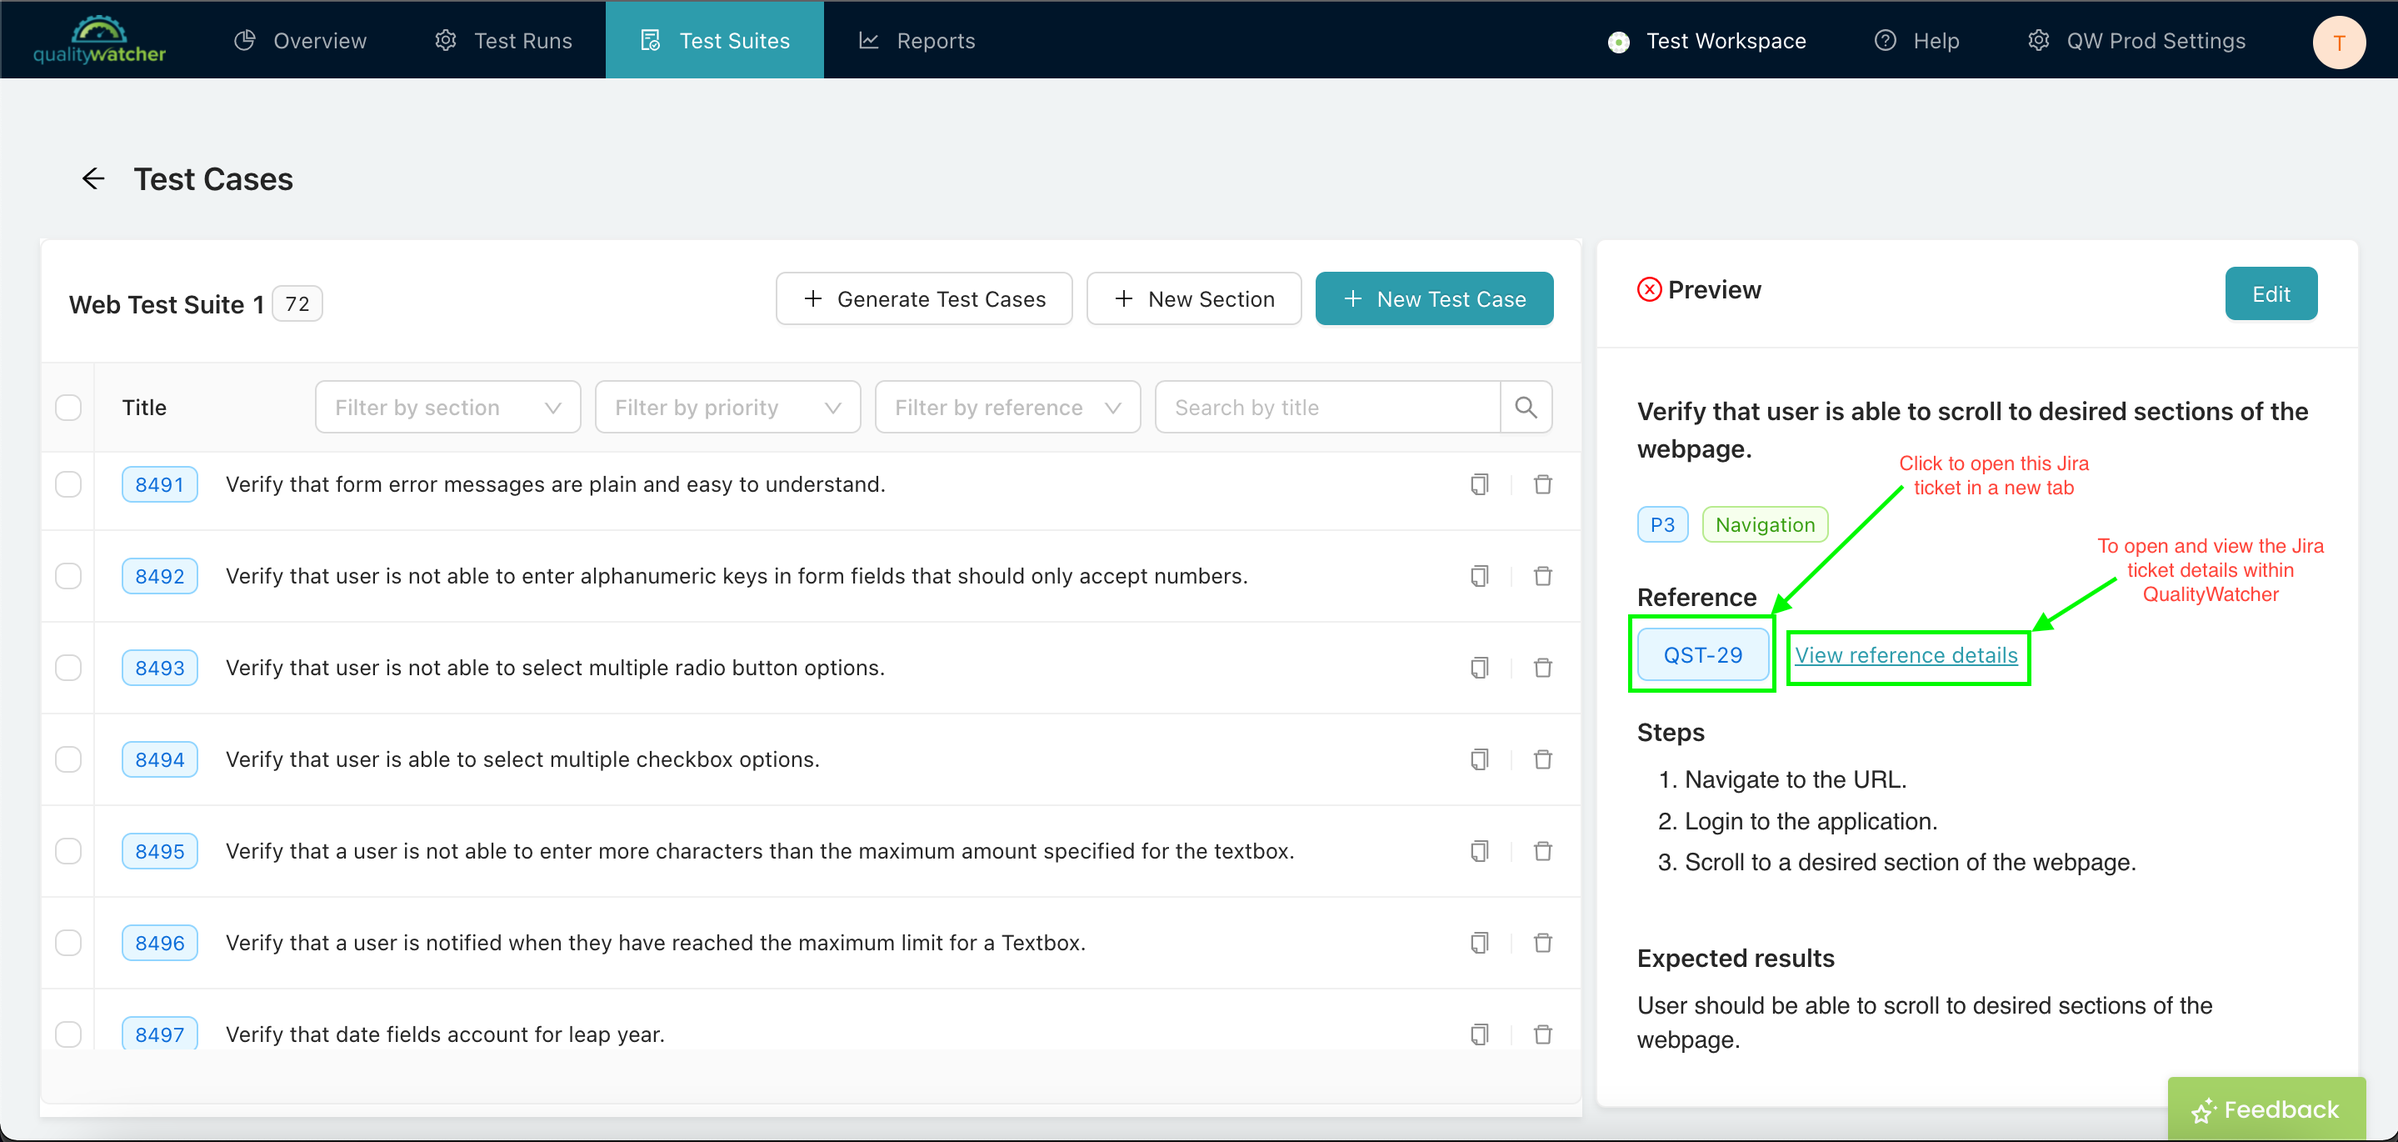
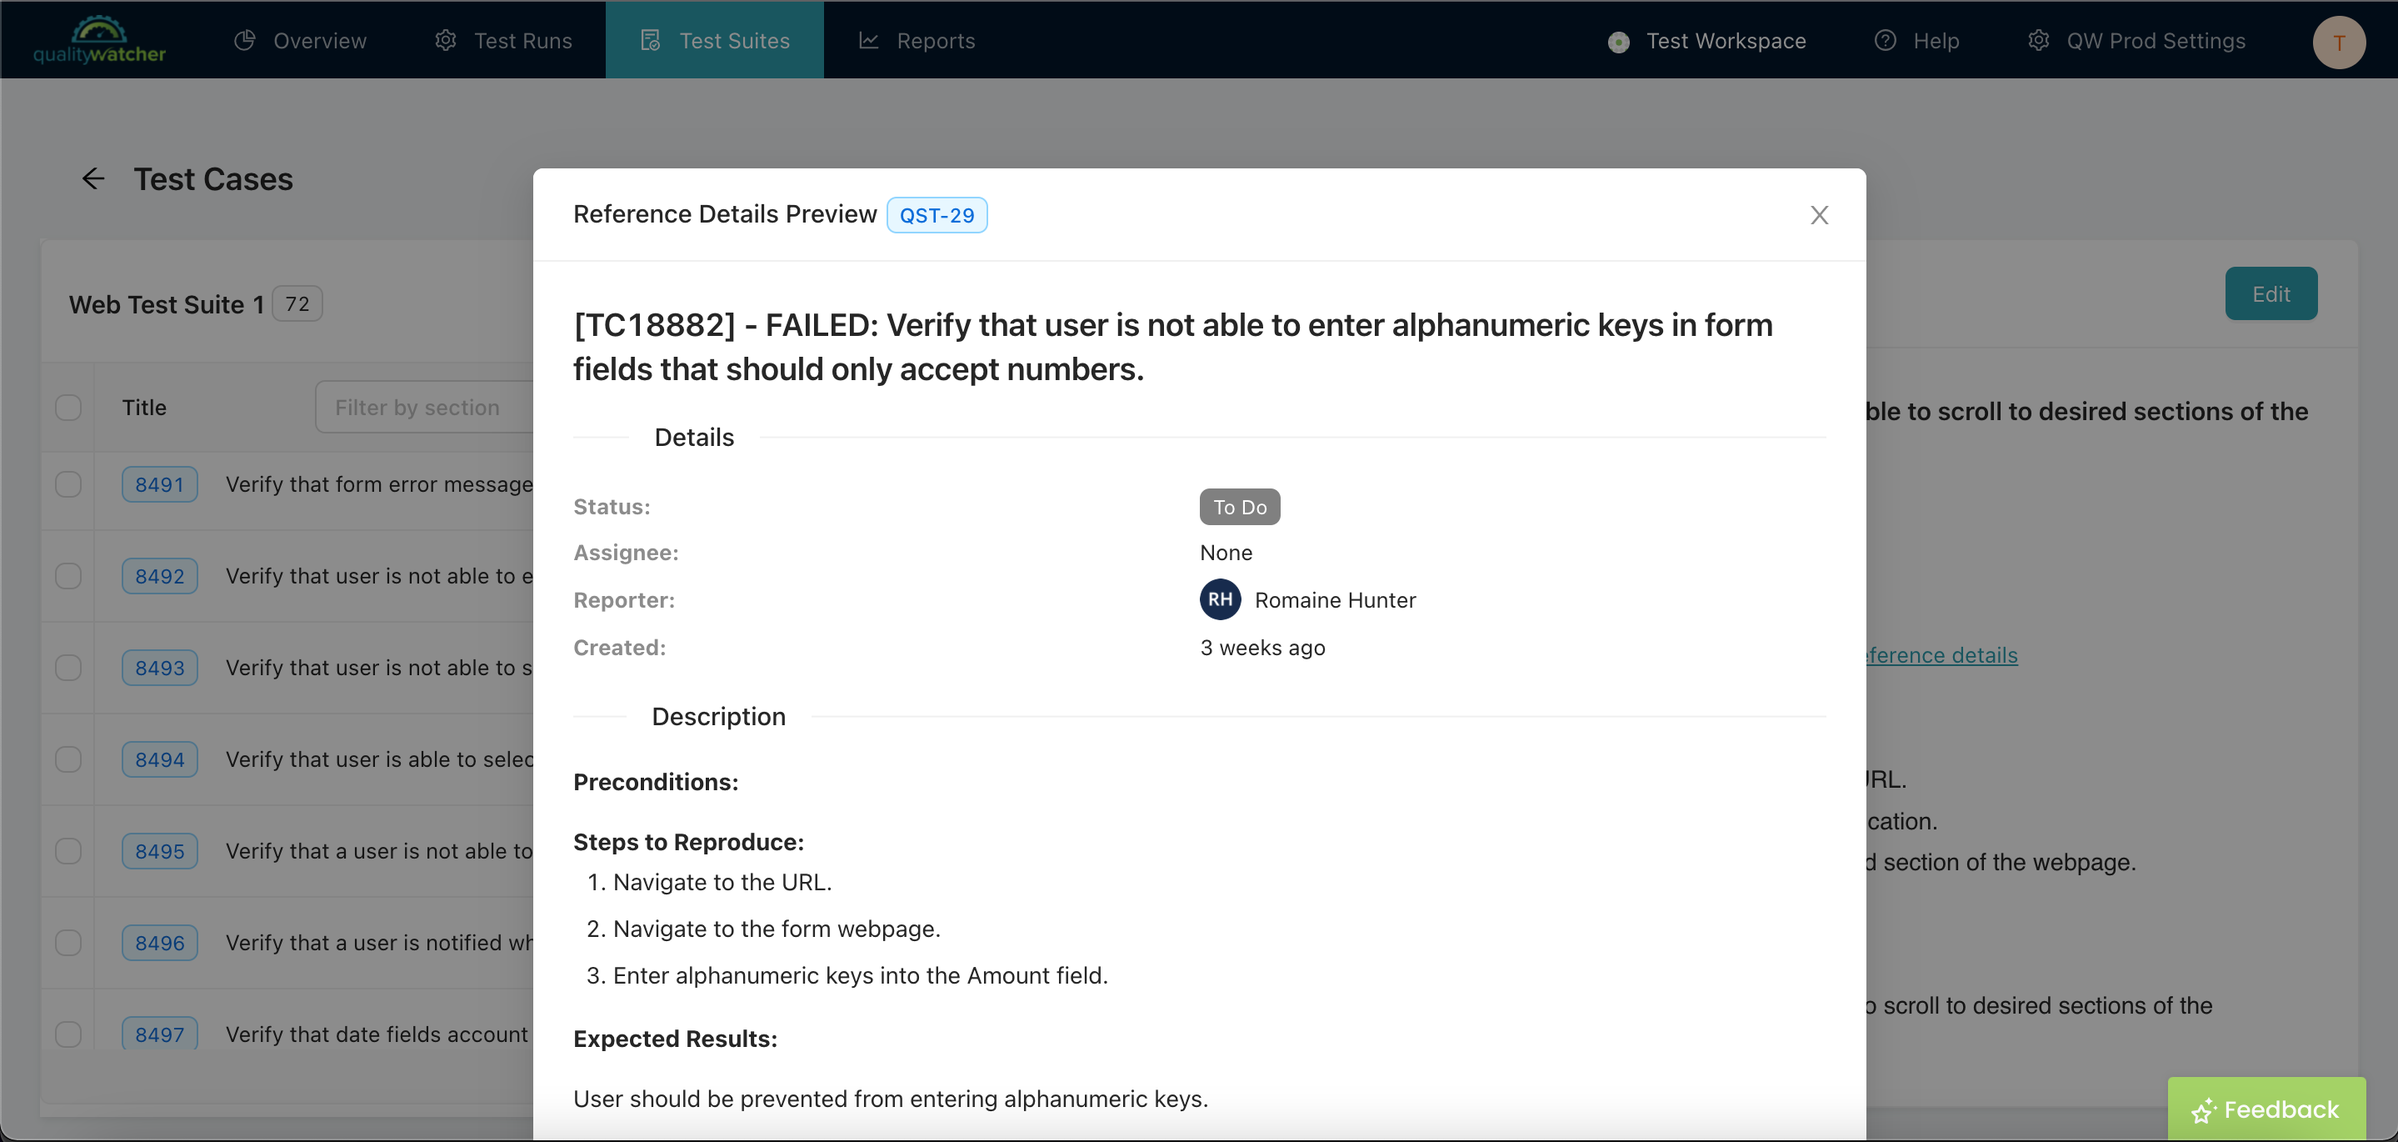
| If a test case has a reference you can click “View reference details“ to view the Jira ticket details with QualityWatcher. |
 |
|---|
| Jira Ticket Details |
Creating Bug/Defect Tickets
In QualityWatcher, you can create bug tickets in Jira for any of your test cases with a “Failed“ status. However, the following criteria must be met for you to create the bug ticket:
Test case must have a “Failed“ status.
The workspace must have Jira Integrations.
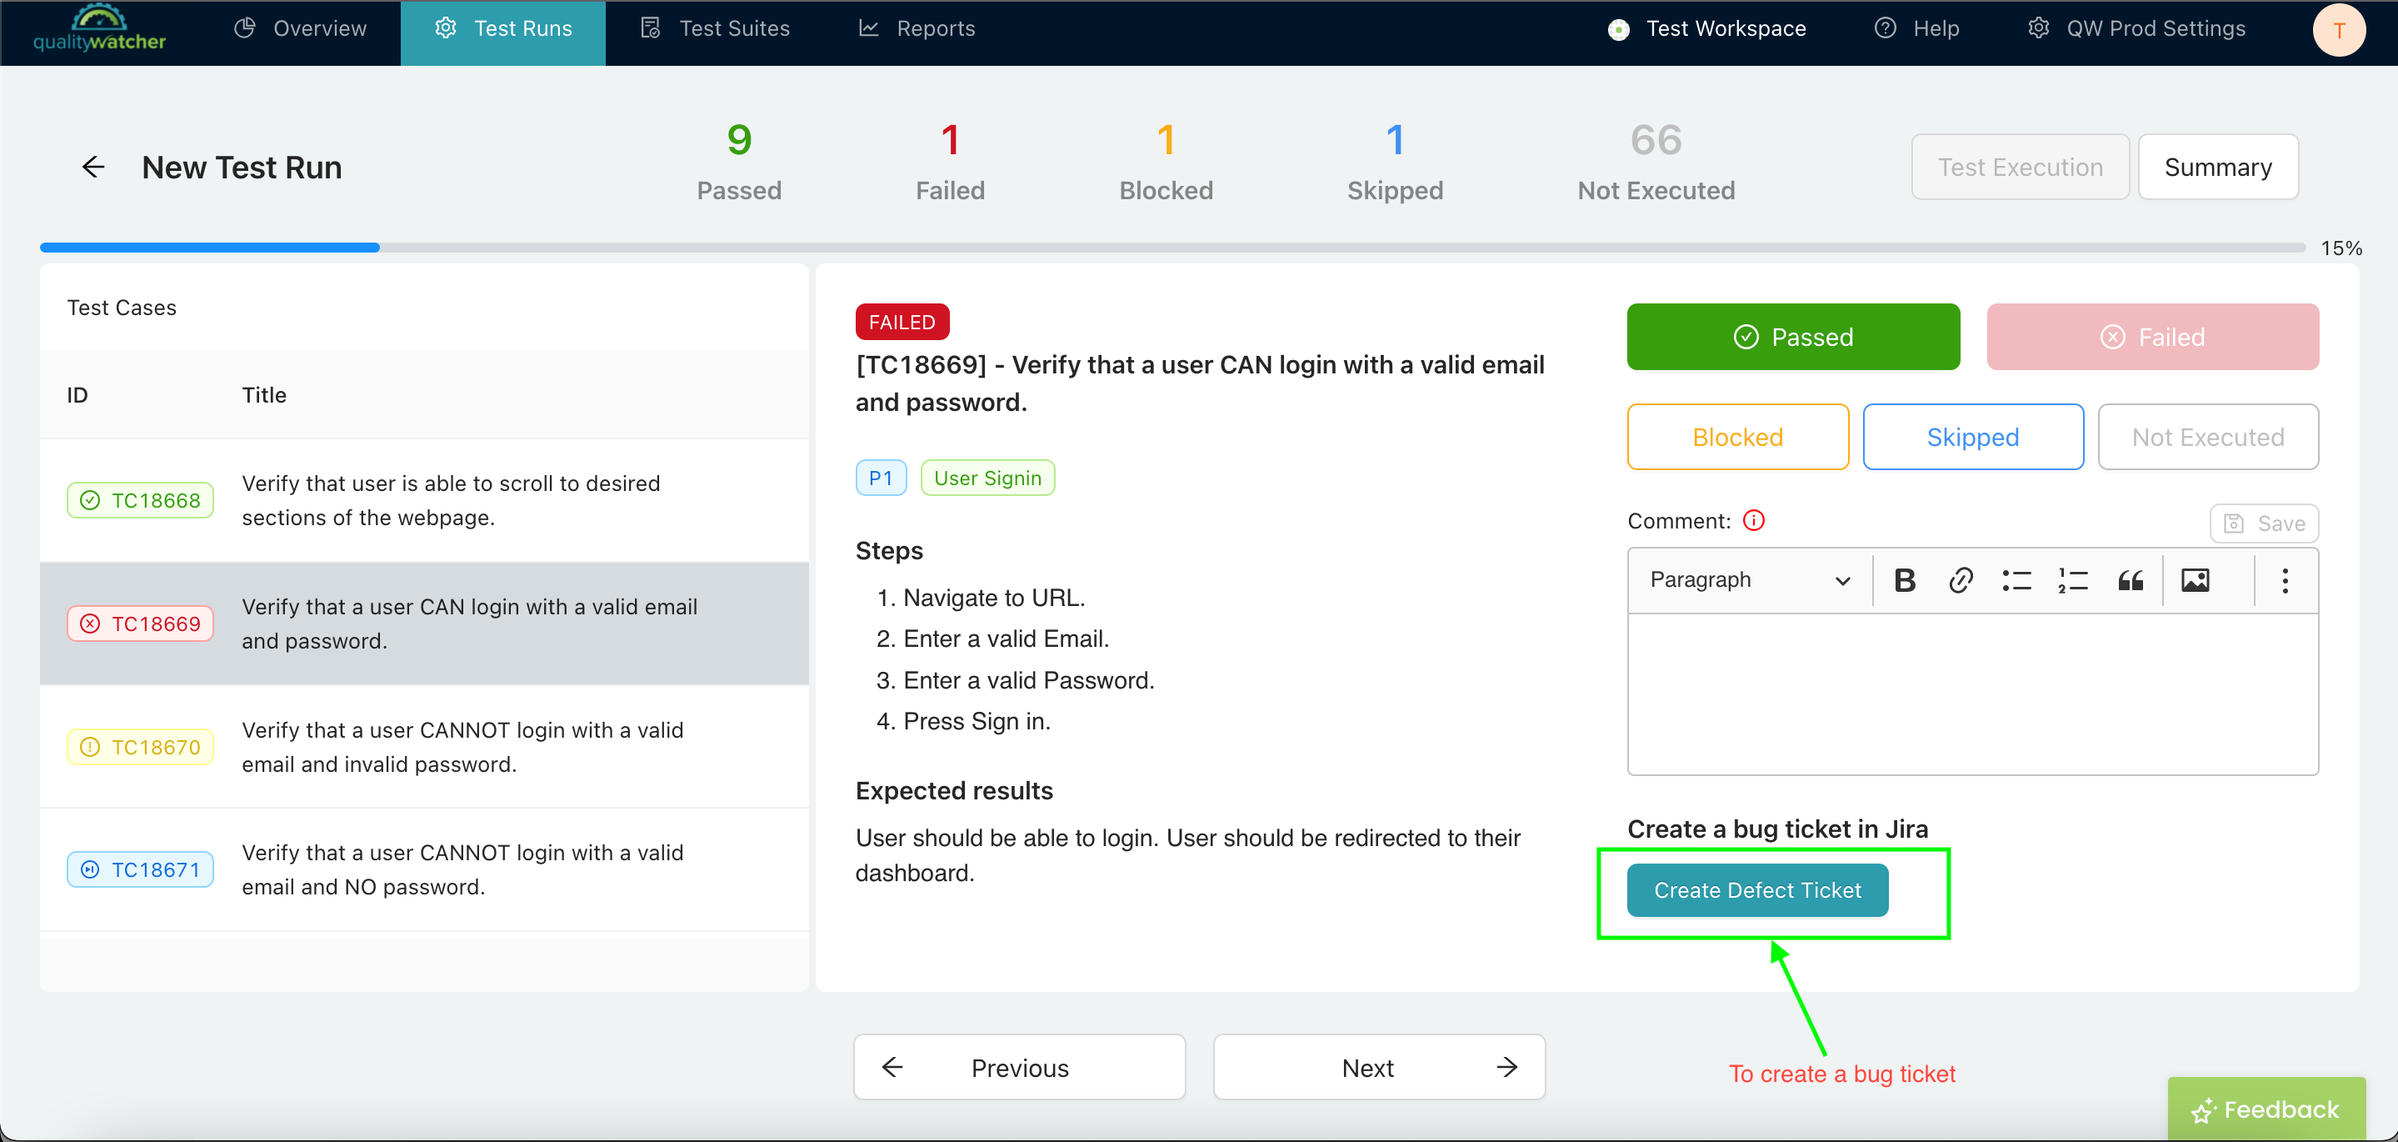
If all those criteria are met, you should see the following:
 |
|---|
| Creating a Jira Bug/Defect Ticket |
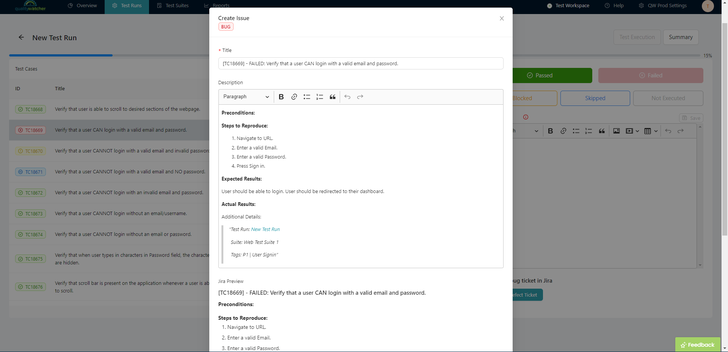
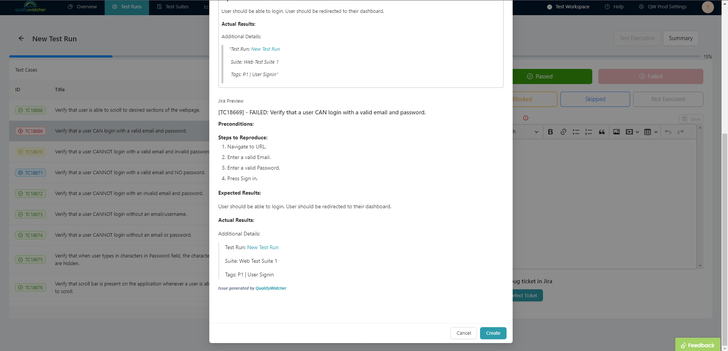
Once the above highlighted button is clicked, you should see the following modal where you can view additional information about the bug. Click “Create Defect Ticket” to create the bug/defect ticket in Jira.
 |  |
|---|---|
| Creating a Jira Bug Ticket | Creating a Jira Bug Ticket |